There are few domestic annoyances as persistent and grating as the mechanical rattle of an aging exhaust system. However, beyond the auditory nuisance, an inefficient unit fails to mitigate moisture effectively, eventually leading to mold growth, peeling wallpaper, and compromised indoor air quality. Consequently, learning how to replace bathroom fan in 5 easy steps is an essential skill for maintaining a healthy and structural sound home environment. By following a systematic approach, homeowners can eliminate excessive humidity and upgrade their living space with professional precision.
The Importance of Efficient Bathroom Ventilation
Before commencing the physical labor, it is imperative to understand the function of the apparatus you are replacing. The exhaust fan serves as the lungs of the bathroom, extracting moisture-laden air and expelling it outdoors. When this system fails or underperforms, the bathroom becomes a breeding ground for mildew.
Many older homes are equipped with contractor-grade fans that are both loud and underpowered. Initiating a bathroom upgrade by installing a modern unit improves air circulation and significantly reduces noise pollution. Modern units are rated by Sones; the lower the Sone rating, the quieter the operation. Ideally, one should seek a quiet exhaust fan rated at 1.5 Sones or less to ensure a peaceful environment. Furthermore, airflow is measured in Cubic Feet per Minute (CFM). A general rule for standard bathrooms is one CFM per square foot of floor space.
Preparation and Safety Measures
Successful maintenance requires adequate preparation. Before you attempt to replace bathroom fan units, gather the necessary tools: a circuit tester, a screwdriver (flathead and Phillips), a drywall saw, wire strippers, HVAC tape, and a ladder.
Safety Warning: Working with electricity carries inherent risks. Locate your home’s main breaker panel and turn off the power to the bathroom circuit. Verify that the power is disconnected by attempting to switch the fan on and using a non-contact voltage tester before touching any wires.
Step 1: Removal of the Existing Unit
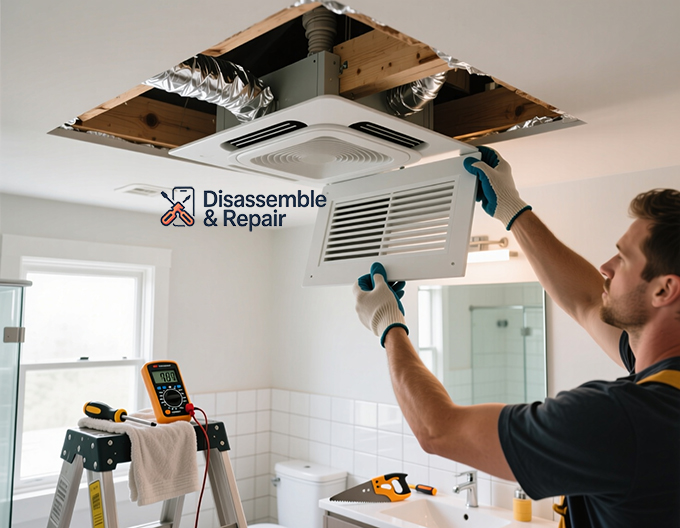
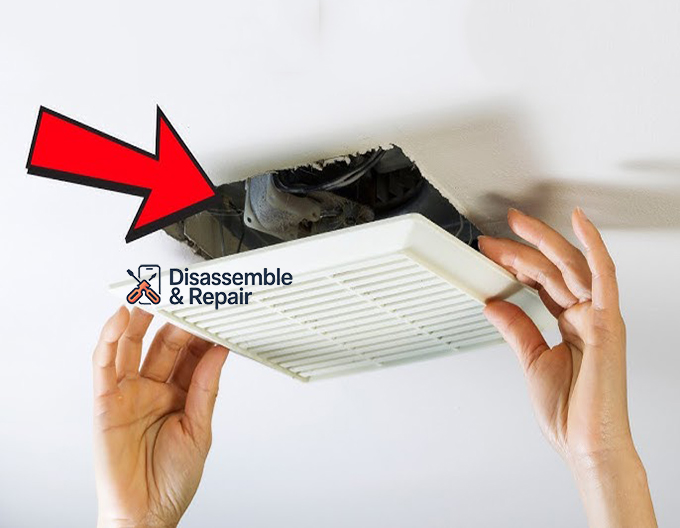
The first phase of the operation involves the careful extraction of the obsolete equipment. Begin by pulling down the plastic grille covering the fan. It is usually held in place by V-shaped tension springs; squeeze these springs together to release the cover. Once the interior is exposed, unplug the motor from the receptacle inside the housing.
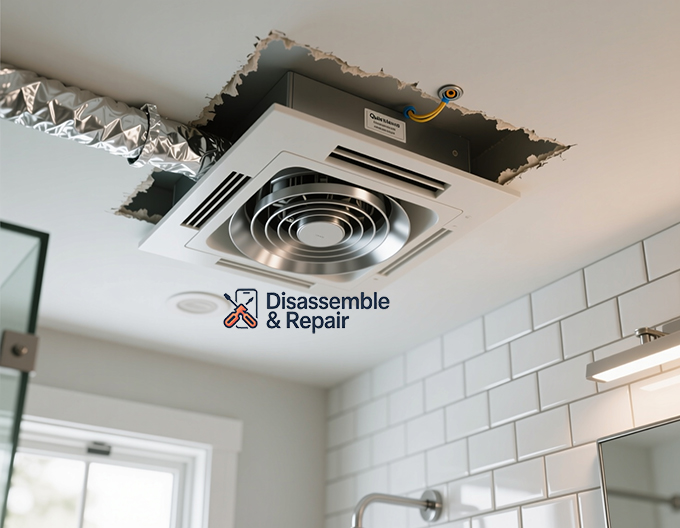
Next, examine how the housing is secured to the ceiling joists. If you are lucky, you may only need a fan motor replacement rather than a full housing swap, provided the new motor is compatible with the existing can size. However, for a comprehensive upgrade, you must remove old fan housing entirely. Remove any screws fastening the housing to the joists. If the unit is nailed to the joist from above (common in older construction), you may need to use a pry bar or cut back a small section of drywall to access the mounting tabs. Disconnect the existing ductwork and the electrical wiring, ensuring the wire nuts are unscrewed carefully.
Step 2: Preparing the Ceiling and Ductwork
With the old unit removed, you are left with a void in the ceiling and exposed ductwork. This is the moment to inspect the condition of your ventilation ducts. Ensure the duct leads directly outside through the roof or a side wall; venting into an attic is a code violation that promotes rot in roof sheathing.
If the new housing is larger than the previous one, use the template provided by the manufacturer to trace the required enlargement on the ceiling. Use a drywall saw to cut along the traced line for a precise fit. Conversely, if the new unit is smaller, you will need to patch the drywall, though most upgrade kits are designed to cover existing footprints. Attach a 4-inch duct connector to the existing exhaust pipe using HVAC tape to ensure an airtight seal, preventing moist air from leaking back into the ceiling cavity.
Step 3: Installing the New Housing
Modern fans often feature “room-side” installation brackets, which facilitate easy home repairs by allowing installation without crawling into the attic. Insert the new housing into the ceiling cut-out. Orient the outlet to align with your ductwork.
Secure the housing to the ceiling joist using the provided screws. If your unit utilizes suspension bars, extend them until they contact the joists on either side of the hole and fasten them securely. The housing must be flush with the ceiling drywall to ensure the grille fits properly later. Once the metal box is mechanically secured, connect the house ductwork to the fan’s outlet collar, sealing the joint with foil tape for maximum efficiency.
Step 4: Electrical Connections
This step demands strict attention to detail. Open the junction box on the new fan housing. You will typically find three wires: black (hot), white (neutral), and green or bare copper (ground). Pull the house wires through the cable clamp into the box.
Connect the wires color-to-color:
- Twist the house black wire together with the fan’s black wire and secure with a wire nut.
- Connect the white house wire to the white fan wire.
- Attach the green (or bare) house ground wire to the green ground screw or wire on the fan housing.
Verify that all connections are tight and that no bare copper is exposed outside the wire nuts. Push the wires neatly back into the junction box and replace the metal cover.
Step 5: Final Assembly and Testing
With the mechanics and electrics established, the final step involves installing the blower assembly (if it was separate) and the decorative grille. Plug the blower motor into the internal receptacle. Turn the power back on at the breaker panel to test the unit.
Listen for smooth operation. A properly installed quiet exhaust fan should hum softly without rattling. To test the suction, hold a single square of toilet paper near the grille; the airflow should be strong enough to hold the paper in place against the fan. Finally, attach the grille by squeezing the mounting springs and inserting them into the slots in the housing. Push the grille up until it sits tight against the ceiling.
See more: Bathroom exhaust fan installation cost
Alternative: The Motor-Only Replacement
For those who are intimidated by drywall work or attic access, there is a simpler alternative. If your current housing is in good condition and standard in size, you might opt for a direct fan motor replacement.
Many manufacturers sell upgrade kits containing a motor and a grille that fit into existing housings. This bypasses the need to remove the metal box from the ceiling. You simply unplug the old motor, snap it out of the housing, and snap the new one in. This approach turns a potentially complex project into one of the most accessible easy home repairs available. However, be aware that this does not correct underlying issues with undersized ductwork or poor housing installation.
Conclusion
Proper ventilation is not merely a luxury; it is a fundamental component of home maintenance that protects your property’s structural integrity and your family’s health. By choosing to replace bathroom fan units that are outdated, you eliminate moisture problems and modernize your bathroom’s functionality.
Whether you choose a full housing replacement or a simple motor swap, the result is a cleaner, quieter, and drier environment. Prioritize safety, measure accurately, and follow these steps to ensure a professional result. Now that you have mastered how to replace bathroom fan in 5 easy steps, you can confidently tackle this project and breathe easier in your upgraded home.
Frequently Asked Questions
How do I choose the right size and noise level for a bathroom fan?
To ensure proper airflow, follow the general rule of one Cubic Foot per Minute (CFM) per square foot of bathroom floor space. For noise control, check the Sone rating; choose a unit rated at 1.5 Sones or less to ensure a quiet, peaceful environment.
Can I replace the fan motor without removing the entire housing?
Yes, if your existing housing is standard-sized and in good condition, you can opt for a motor-only replacement. Many manufacturers sell upgrade kits that allow you to unplug and snap out the old motor, then snap the new one in, bypassing the need for drywall work or housing removal.
How do I test if my bathroom fan is venting properly?
You can perform a simple suction test using a single square of toilet paper. Turn the fan on and hold the paper near the grille; if the airflow is sufficient, the suction should hold the paper firmly in place against the fan.
Do I need attic access to install a new bathroom fan?
Not always. Many modern fans are designed with “room-side” installation brackets. This feature allows you to insert and secure the new housing directly through the ceiling cut-out from inside the bathroom, eliminating the need to crawl into the attic.


