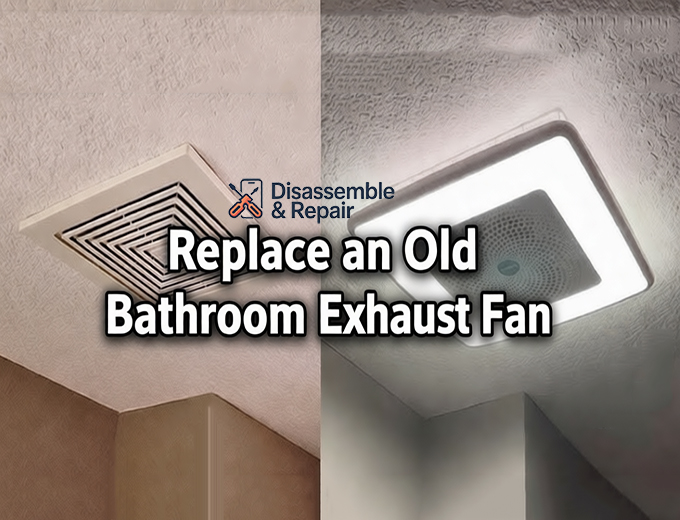
A functioning bathroom exhaust fan is essential for maintaining indoor air quality and preventing structural damage caused by excess moisture. If your current unit is rattling, vibrating, or failing to clear the mirror of fog after a shower, it is likely time to Replace an Old Bathroom Exhaust Fan. Unlike a fresh installation in a new location, swapping out an existing unit involves specific challenges, such as removing the old housing without damaging the ceiling and matching ductwork sizes.
This article focuses specifically on the replacement process. However, it is important to understand the broader context of ventilation installation. Many homeowners start by researching “How to Install a Bathroom Exhaust Fan” generally, only to realize that retrofitting an existing space requires a tailored approach. Whether you are undertaking a simple motor swap or a complete housing upgrade, this guide covers the essential steps for a professional result.
For those situations where no fan currently exists and you are cutting into drywall for the first time, you should refer to our comprehensive resource: Install a Bathroom Exhaust Fan: A DIY Guide. For everyone else ready to upgrade their existing fixture, let’s begin.
Signs It Is Time for a Bathroom Fan Replacement
Before you gather your tools, confirm that a replacement is actually necessary. Sometimes a thorough cleaning can resolve noise issues, but mechanical wear is often irreversible. Look for these indicators that an upgrade exhaust fan project is in your future:
- Excessive Noise: A grinding or rattling sound usually indicates motor bearing failure.
- Poor Performance: If moisture lingers on walls and mirrors for longer than 15 minutes after a shower, the CFM (Cubic Feet per Minute) rating may be too low, or the motor is dying.
- Age: Fans older than 10 years are often inefficient and noisy compared to modern standards.
- Visual Damage: Rust or mold on the housing suggests the unit is no longer sealing correctly against the ceiling joists.
Tools and Materials Needed
To successfully Replace an Old Bathroom Exhaust Fan, preparation is key. Having the right tools on hand will ensure the old fan removal goes smoothly and the new unit is installed securely.
- New Exhaust Fan: Ensure the CFM rating is appropriate for your bathroom size.
- Screwdrivers: Both flathead and Phillips head.
- Circuit Tester: Essential for safety.
- Drywall Saw: If the new housing is slightly larger than the old one.
- HVAC Tape: For sealing the duct connection.
- Wire Nuts and Electrical Tape: For secure connections.
- Ladder and Safety Gear: Safety glasses and a dust mask.
Step 1: Safety First and Preparation
The most critical step in any electrical project is ensuring the power is off. Locate your home’s main circuit breaker panel and flip the switch controlling the bathroom. Attempt to turn the fan on to confirm the power is cut.
Once the area is safe, cover the floor and fixtures below the fan with a drop cloth. Old fan removal can be messy, dropping dust, insulation, and drywall debris.
Step 2: Remove the Grille and Old Motor Assembly
Start by removing the plastic cover (grille). Most covers are held in place by tension springs. Pull the cover down gently a few inches, squeeze the springs together, and slide them out of the slots in the housing.
With the housing exposed, you will see the motor assembly. Unplug the motor from the receptacle inside the housing. Look for screws or tabs securing the motor plate to the housing. Remove these screws and gently pull the motor assembly out. This reduces the weight of the unit, making the rest of the removal process easier.
Step 3: Disconnect the Electrical Wiring
Locate the junction box cover inside the fan housing. Remove the screw holding it in place to expose the wiring. You should see black (hot), white (neutral), and green or bare (ground) wires. Unscrew the wire nuts connecting the house wires to the fan wires.
Handle these wires with care. If the insulation looks brittle or damaged, you may need to trim and strip them back to ensure a safe connection later. Dealing with electrical components requires precision. For a deeper dive into the specific requirements of electrical connections in this environment, please read our article on Wiring a Bathroom Exhaust Fan Safely.
Step 4: Remove the Old Housing
This is often the most challenging part of the project. Most old fans are nailed or screwed directly into a ceiling joist.
- Disconnect the Duct: Locate where the exhaust duct attaches to the fan housing. You may need to pull the housing down slightly to access the duct tape or clamp.
- Remove Fasteners: If you can see the screws into the joist, remove them. If the unit was installed before the drywall was put up, it might be nailed in via mounting brackets. You may need to use a flat bar to pry the housing loose from the joist.
- Extract the Box: Gently wiggle the housing out of the ceiling hole. Be careful not to pull down on the ductwork or damage the surrounding drywall more than necessary.
Step 5: Prepare the Opening and Install New Housing
Measure your new fan housing against the existing hole.
- If the new fan is larger: Trace the outline of the new housing onto the ceiling and use a drywall saw to enlarge the opening.
- If the new fan is smaller: You will need to patch the drywall after installation, or use a specialized trim ring designed to hide gaps.
Insert the new housing into the ceiling. Most modern replacement fans come with “easy-install” brackets that can be inserted through the hole and tightened against the drywall and joist without needing attic access. Secure the housing firmly to the joist using the provided screws.
Connect the exhaust duct to the new fan’s outlet port. Use HVAC tape to seal the connection thoroughly. A proper seal is vital; leaking air can pump moisture into your attic, leading to mold growth.
Step 6: Connect the New Wiring
With the housing secured, it is time to connect the power. Bring the house wires into the new junction box. Connect black to black, white to white, and ground to ground using wire nuts. Wrap the connections with electrical tape for added security and tuck them neatly into the junction box. Reattach the junction box cover.
When you Replace an Old Bathroom Exhaust Fan, ensuring the electrical polarity is correct is essential for the longevity of the new motor. Double-check that no bare wire strands are exposed outside the wire nuts.
Step 7: Final Assembly and Testing
Install the new motor assembly into the housing if it wasn’t already attached. Plug the motor into the internal receptacle. Before attaching the grille, restore power at the breaker panel and test the fan.
- Listen: It should run smoothly without rattling.
- Check Flow: Hold a piece of tissue paper near the fan; the suction should hold it against the unit.
Once verified, attach the new grille by squeezing the tension springs and inserting them into the slots. Push the grille up until it sits flush against the ceiling.
Troubleshooting Common Installation Issues
Even with a professional approach, issues can arise.
- Fan is Noisy: Check if the housing is loose and vibrating against the joist. Tighten mounting screws.
- Low Suction: Ensure the duct is not kinked or blocked. Long runs of flexible ducting can reduce airflow; rigid ducting is preferred for efficiency.
- Backdrafts: Ensure the damper on the new fan housing opens freely when the fan is on and closes when it is off.

Conclusion
Upgrading your bathroom ventilation is a manageable DIY project that offers immediate benefits in comfort and home protection. By following these seven steps, you ensure that moisture is effectively removed from your bathroom, protecting your paint, drywall, and health.
Regular maintenance, such as cleaning the grille and motor blades annually, will prolong the life of your new unit. Now that you have successfully completed the project to Replace an Old Bathroom Exhaust Fan, you can enjoy a quieter, fresher bathroom environment for years to come.
Here’s an FAQ generated from the provided text:
Bathroom Exhaust Fan Replacement FAQ
Q: Why is a functioning bathroom exhaust fan important?
A: A functioning bathroom exhaust fan is essential for maintaining indoor air quality and preventing structural damage caused by excess moisture.
Q: What are the signs that I need to replace my bathroom exhaust fan?
A: You should consider replacing your fan if you notice:
- Excessive Noise: Grinding or rattling sounds, often indicating motor bearing failure.
- Poor Performance: Moisture lingering on walls and mirrors for longer than 15 minutes after a shower.
- Age: Fans older than 10 years are often inefficient and noisy compared to modern units.
- Visual Damage: Rust or mold on the housing, suggesting improper sealing.
Q: When might I not need to replace my fan?
A: Sometimes, noise issues can be resolved with a thorough cleaning. However, mechanical wear, if present, is usually irreversible.
Q: What’s the difference between replacing an old fan and installing a new one from scratch?
A: Replacing an old fan focuses on swapping out an existing unit, which involves challenges like removing the old housing without damaging the ceiling and matching existing ductwork. Installing a new fan from scratch, where no fan currently exists, involves cutting into drywall for the first time.
Q: Where can I find information about installing a bathroom exhaust fan from scratch?
A: For situations where no fan currently exists, you should refer to a comprehensive resource like “Install a Bathroom Exhaust Fan: A DIY Guide.”
Q: What tools and materials are needed to replace a bathroom exhaust fan?
A: To successfully replace a bathroom exhaust fan, you will need:
- New Exhaust Fan (with appropriate CFM rating for your bathroom size)
- Screwdrivers (flathead and Phillips head)
- Circuit Tester
- Drywall Saw (if the new housing is slightly larger)
- HVAC Tape
- Wire Nuts and Electrical Tape
- Ladder
- Safety Gear (safety glasses and a dust mask)
Q: What is the most critical first step before starting the replacement process?
A: The most critical first step in any electrical project is ensuring the power is off. Locate your home’s circuit breaker and turn off the power to the bathroom where you will be working.


