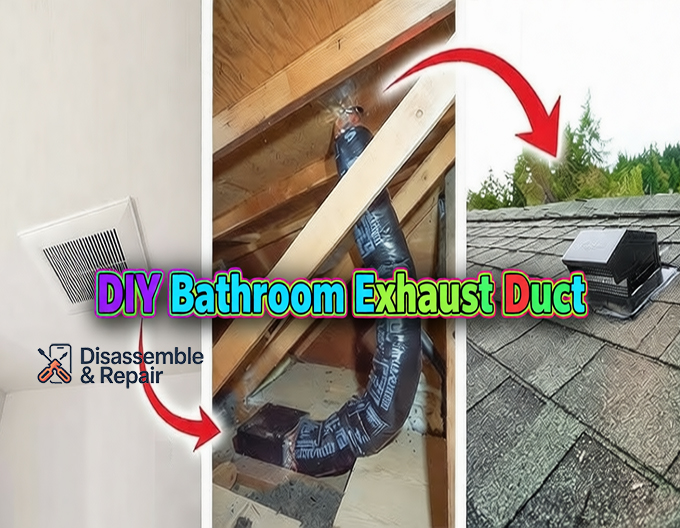
A bathroom exhaust fan is more than just a luxury; it’s a critical component for maintaining a healthy and comfortable home environment. It whisks away excess moisture, unpleasant odors, and airborne pollutants, preventing issues like mold growth, peeling paint, and poor indoor air quality. But the effectiveness of your exhaust fan hinges almost entirely on one often-overlooked element: the exhaust fan duct.
Many DIY enthusiasts, keen to improve their homes, jump into installing or replacing bathroom exhaust fans without fully understanding the nuances of proper ductwork. This can lead to inefficient operation, premature fan failure, and even significant damage to your home. This comprehensive guide will illuminate the common pitfalls in DIY exhaust fan duct installation and provide expert insights to help you avoid them.
Key Takeaways
- Proper Ducting is Crucial: The type, size, length, and routing of your exhaust fan duct directly impact fan performance and moisture removal.
- Avoid Flexible Vinyl/Plastic Ducting: Opt for rigid metal ductwork, especially insulated, to prevent airflow restriction, condensation, and fire hazards.
- Size Matters: Match your duct diameter to your fan’s CFM rating and manufacturer specifications for optimal efficiency. Undersized ducts lead to poor performance and noise.
- Vent Outdoors, ALWAYS: Never vent into an attic, soffit, crawl space, or wall cavity. This leads to moisture buildup, mold, and structural damage.
- Seal and Insulate: Ensure all connections are tightly sealed with mastic or UL-listed foil tape, and insulate ducts in unconditioned spaces to prevent condensation.
- Include a Backdraft Damper: Essential for preventing cold air, pests, and unconditioned air from entering your home when the fan is off.
Why a Proper Bathroom Exhaust Duct System is Crucial
Every hot shower, bath, or even just daily use introduces humidity into your bathroom. Without an effective ventilation system, this moisture can wreak havoc.
- Moisture Control & Mold Prevention: Excess humidity provides a perfect breeding ground for mold and mildew, which can trigger allergies, respiratory issues, and cause unsightly stains. A properly ducted fan efficiently removes this moisture.
- Odor Removal: Beyond moisture, exhaust fans eliminate lingering odors, keeping your bathroom fresh.
- Protecting Your Home’s Structure: Persistent moisture can lead to peeling paint, warped trim, and even compromise the structural integrity of your walls and ceiling over time. Correct ventilation safeguards your investment.
- Improving Indoor Air Quality: Exhaust fans help remove chemical fumes from cleaning products and other airborne irritants, contributing to a healthier living environment.
Common DIY Bathroom Exhaust Duct Mistakes to Avoid
Understanding these common missteps is the first step toward a successful installation.
Using the Wrong Type of Ducting
One of the most frequent and impactful mistakes is using inappropriate duct material.
- Flexible Vinyl/Plastic Ducting: While seemingly easy to install due to its flexibility and lower cost, flexible vinyl or plastic ducting is a poor choice for bathroom exhaust. Its ribbed interior significantly restricts airflow, reducing the fan’s efficiency and increasing noise. It can also sag, creating low spots where condensation can collect, leading to mold and blockages. In some regions, it may not meet local building codes due to fire hazards.
- The Right Choice: Rigid Metal Ducting: Smooth, rigid metal ducts (galvanized steel or aluminum) offer minimal airflow resistance, ensuring your fan operates at peak efficiency. They are more durable, easier to clean, and less prone to condensation, especially when insulated. If rigid ducting isn’t entirely feasible, a short, taut section of insulated flexible ducting can be used to connect to the fan, followed by rigid duct for the main run.
Improper Duct Sizing
“One size fits all” simply doesn’t apply to ductwork.
- Too Small: An undersized duct creates excessive static pressure, forcing the fan to work harder, reducing its effectiveness (CFM), and increasing noise levels. This means your bathroom won’t be properly ventilated.
- Too Large: While less common than being too small, an excessively large duct can also be inefficient, leading to less effective air movement and potential condensation issues.
- Matching Fan CFM to Duct Diameter: Always refer to your fan manufacturer’s specifications for the recommended duct size. A common diameter is 4 inches, but higher CFM fans often require 6-inch ducts for optimal performance. If your fan has dual collar sizes, always choose the larger one for better airflow.
Excessive Length or Too Many Bends
Airflow is greatly impacted by the path it has to take.
- Impact on Airflow: Long duct runs and numerous sharp 90-degree bends dramatically increase static pressure, causing your fan’s effective CFM to drop significantly. Each 90-degree elbow can reduce airflow as much as several feet of straight duct.
- Best Practice: Plan the shortest and most direct route possible from the fan to the exterior vent. Use gradual bends instead of sharp 90-degree elbows when turns are unavoidable. Some experts recommend at least two to three feet of straight duct run from the fan exhaust port before the first elbow.
Incorrectly Venting into Unconditioned Spaces
This is arguably the most critical mistake to avoid.
- The Danger Zone: Never vent your bathroom exhaust fan into an attic, soffit, crawl space, or wall cavity. These unconditioned spaces cannot handle the concentrated moisture.
- Consequences: Dumping moist air into these areas leads to rapid condensation, fostering mold and mildew growth on wood framing and insulation, rotting wood, and attracting pests. This can severely damage your home’s structure and insulation and lead to costly repairs.
- Proper Outdoor Termination: The exhaust fan duct must extend all the way to the exterior of your home, terminating through a roof cap, gable wall vent, or a properly designed soffit vent. Ensure the termination point is away from windows or other openings to prevent exhausted air from re-entering the house.
Poorly Sealed or Leaky Connections
Even the best ducting material will fail if not properly sealed.
- Energy Loss and Moisture Escape: Gaps or loose connections in the ductwork allow conditioned indoor air to escape and unconditioned air (and moisture) to infiltrate, reducing efficiency and potentially causing condensation within the duct or attic.
- The Right Sealants: Use UL-listed foil tape (not fabric duct tape) or mastic sealant to create airtight connections at every joint and where the duct connects to the fan and exterior vent.
Neglecting Proper Insulation
Often overlooked, especially in colder climates.
- Preventing Condensation: When warm, moist air travels through an uninsulated duct in a cold attic or wall cavity, the temperature difference causes water vapor to condense inside the duct. This can lead to water pooling in low spots, dripping back into the bathroom, or causing mold within the duct.
- Solution: All ductwork passing through unconditioned spaces (attics, crawl spaces, unheated basements) should be insulated. Use insulated flexible ducting or wrap rigid ducts with R-value appropriate insulation to maintain the air temperature and prevent condensation.
Ignoring Backdraft Dampers
A small but critical component.
- Purpose: Backdraft dampers are one-way valves that allow air to exit but prevent outside air, cold drafts, pests, and unconditioned air from entering your home when the fan is off. Many exhaust fans have an integrated damper, but an additional one at the exterior termination is often beneficial.
- Checking Functionality: Ensure both the fan’s internal damper and any external damper are unobstructed and can open and close freely. A stuck damper can significantly impede airflow.
Not Considering Accessibility for Maintenance
- Long-term Care: Exhaust fans and ducts require occasional cleaning and inspection. Design your duct route with future accessibility in mind to make maintenance easier.
For more detailed guidance on the hands-on process, consider reviewing resources on How to install duct for bathroom exhaust fan to complement this information.
Best Practices for Your DIY Exhaust Fan Duct Installation
By taking a thoughtful approach, you can ensure your bathroom ventilation system works efficiently for years to come.
Plan Your Project Thoroughly
Before you even buy a fan, map out your entire ventilation system. Consider the shortest, straightest route for your ductwork, identifying potential obstructions and the ideal exterior termination point. Measure your bathroom’s square footage to select a fan with an appropriate CFM (Cubic Feet per Minute) rating. For bathrooms 100 sq ft or less, aim for at least 1 CFM per square foot. For larger bathrooms, calculate 50 CFM for each toilet, shower, and tub, and 100 CFM for a jetted tub.
Choose the Right Materials
Prioritize rigid metal ducting over flexible options for the main run. If some flexibility is needed for connections, use short, taut sections of insulated flexible duct. Always use UL-listed foil tape or mastic sealant for all connections.
Secure and Seal All Connections
Every joint, seam, and penetration must be airtight. Use clamps to secure ducts to fan collars and vent caps, and then seal thoroughly with foil tape or mastic. Air-seal around the fan housing and duct penetration points with caulk or spray foam to prevent air leakage into unconditioned spaces.
Insulate Ducts in Unconditioned Spaces
If your duct runs through an attic, crawl space, or other unheated area, insulate it. This is a crucial step to prevent condensation, especially in colder climates.
Ensure Proper Outdoor Termination
Install a high-quality exterior vent cap that includes a backdraft damper and a grille to keep out pests. Ensure the cap is properly flashed and sealed to prevent water intrusion. Venting through the roof is generally considered the best option, followed by a gable wall, and then a well-designed soffit vent. Avoid venting under a soffit if possible, as moist air can get trapped and re-enter the attic.
Conclusion
A properly installed bathroom exhaust system is vital for a healthy, comfortable, and well-maintained home. The exhaust fan duct is the unsung hero of this system, and cutting corners during its installation can lead to myriad problems, from inefficient operation and increased energy bills to severe mold growth and structural damage. By understanding and avoiding these common DIY mistakes—from choosing the right ducting material and sizing to ensuring proper outdoor termination and insulation—you can ensure your bathroom exhaust fan performs optimally for years to come. Take the time to plan, research, and execute your DIY exhaust fan duct project with care, and breathe easier knowing your bathroom is well-ventilated and protected.
FAQ
Why is the exhaust fan duct system so crucial for a bathroom fan?
The effectiveness of your exhaust fan, and its ability to efficiently remove excess moisture, unpleasant odors, and airborne pollutants, relies almost entirely on proper ductwork. A well-designed and installed duct system prevents issues like mold growth, peeling paint, and poor indoor air quality, maintaining a healthy and comfortable home environment.
What type of ducting is best for a bathroom exhaust fan, and what should I avoid?
You should always opt for rigid metal ductwork, preferably insulated, to ensure optimal airflow, prevent condensation, and reduce fire hazards. It’s crucial to avoid flexible vinyl or plastic ducting as it easily restricts airflow, can sag, collect moisture, and leads to inefficient fan operation and potential hazards.
Where should a bathroom exhaust fan always vent to?
It is critical to always vent outdoors. Never vent into an attic, soffit, crawl space, or any wall cavity. Venting into unconditioned or enclosed spaces will inevitably lead to moisture buildup, mold growth, and potential structural damage to your home.
How important is the size of the exhaust duct, and how do I choose the correct one?
Duct size is extremely important. Undersized ducts severely restrict airflow, causing the fan to work harder, leading to poor performance, increased noise, and premature fan failure. Always match your duct diameter to your fan’s CFM (Cubic Feet per Minute) rating and strictly follow the manufacturer’s specifications for optimal efficiency.
What other essential steps should I take to ensure proper duct installation?
Beyond choosing the right duct type and size, ensure all duct connections are tightly sealed with mastic or UL-listed foil tape to prevent air leaks. Insulate ducts that run through unconditioned spaces (like attics or crawl spaces) to prevent condensation. Finally, always include a backdraft damper at the fan or vent cap to stop cold air, pests, and unconditioned air from entering your home when the fan is off.