Is a persistent, unpleasant odor wafting from your bathroom, making what should be a sanctuary feel less than fresh? You’re not alone. Many homeowners overlook a key culprit in bathroom odors: the exhaust fan. While often out of sight, this unsung hero of ventilation can become a haven for dust, grime, and moisture, eventually leading to musty, stale, or even foul smells. The good news? Cleaning your exhaust fan is a straightforward task that can significantly eliminate bathroom smell and restore freshness to your space.
This comprehensive guide will walk you through everything you need to know to thoroughly clean your bathroom exhaust fan, quickly and effectively, ensuring your bathroom always smells clean and inviting.
Key Takeaways
- A dirty exhaust fan is a primary cause of lingering bathroom odors, mold, and reduced air quality.
- Regular cleaning (every 3-6 months) is crucial for efficient operation and a fresh bathroom.
- Always cut power at the circuit breaker before beginning any cleaning.
- You’ll need basic tools like a screwdriver, vacuum, brush, and mild cleaner.
- Deep cleaning involves removing the cover, cleaning blades and housing, and can sometimes include motor removal for a more thorough job.
- Beyond cleaning, consistent fan use and proper bathroom hygiene contribute to long-term freshness.
The Silent Culprit: Why Your Bathroom Exhaust Fan Smells
Your bathroom exhaust fan plays a critical role in maintaining indoor air quality by removing excess moisture, humidity, and airborne contaminants. When you shower, bathe, or even just use the toilet, the fan pulls out the humid air and any accompanying odors, venting them outside. However, over time, this vital appliance can become a source of the very problem it’s designed to solve.
Accumulation of Dust, Grime, and Moisture
As the fan draws air, it also collects airborne particles like dust, lint, hair, and even skin cells. This debris settles on the fan cover, blades, and inside the housing. When this accumulation combines with the constant moisture present in a bathroom, it creates a damp, clumpy sludge that becomes an ideal breeding ground for bacteria and mold. This mix is a common source of sour or musty odors. A clogged fan also struggles to move air efficiently, leading to moisture buildup that further exacerbates the issue.
Mold and Mildew Growth
Bathrooms are naturally humid environments. If your exhaust fan isn’t running long enough or is clogged, moisture can linger in the fan housing and ductwork. This warm, moist environment is perfect for mold and mildew growth, which produce distinct, unpleasant musty smells. These spores can then be recirculated into your bathroom air, affecting air quality and potentially triggering allergies.
The Undeniable Benefits of a Sparkling Clean Exhaust Fan
Regularly cleaning your bathroom exhaust fan isn’t just about removing odors; it offers a multitude of benefits for your home and health.
Effective Odor Elimination
This is perhaps the most immediate and noticeable benefit. A clean fan can efficiently pull out unpleasant smells, helping to eliminate bathroom smell caused by daily use or lingering moisture. When the fan blades are free of obstruction, they can move air more effectively, removing odors from the air quickly.
Improved Air Quality
Beyond just bad smells, bathroom air can contain airborne contaminants and allergens. A clean exhaust fan efficiently removes these particles, along with excess moisture, contributing to healthier indoor air quality. This is especially important for households with allergy sufferers or those sensitive to mold spores.
Enhanced Fan Efficiency and Longevity
When a fan is caked with dust and grime, it has to work harder to move the same amount of air. This increased strain not only reduces its effectiveness but also consumes more energy and can shorten the lifespan of the motor. Regular cleaning means the fan runs smoothly, quietly, and efficiently, extending its operational life and saving you money on potential replacements or higher energy bills.
Before You Begin: Gathering Your Essential Cleaning Arsenal
Having all your tools ready will make the cleaning process much faster and smoother.
You’ll need:
- A sturdy stepladder
- Screwdrivers (Phillips and flathead, a magnetic-tip is helpful)
- Vacuum cleaner with hose attachments (brush and crevice tools are essential)
- Mild dish soap or all-purpose cleaner
- Microfiber cloths or soft rags
- Soft-bristled brush (an old toothbrush works well for tight spots)
- Bucket of warm water
- Safety goggles and a dust mask (to protect from falling debris)
- Optional: Compressed air can (for blowing dust out of motor/tight spots)
- Optional: Drop cloth or newspaper (to protect the floor)
Step-by-Step Guide: How to Clean Your Exhaust Fan Fast and Effectively
Follow these steps for a thorough clean that will get rid of stubborn odors.
Safety First: Power Down!
This is the most critical step. Before touching any part of your exhaust fan, you must turn off the power to prevent electric shock. Go to your home’s electrical panel and flip the circuit breaker that controls your bathroom. If it’s not clearly labeled, turn off the main breaker for your home. Double-check the fan switch to ensure no power is reaching the unit.
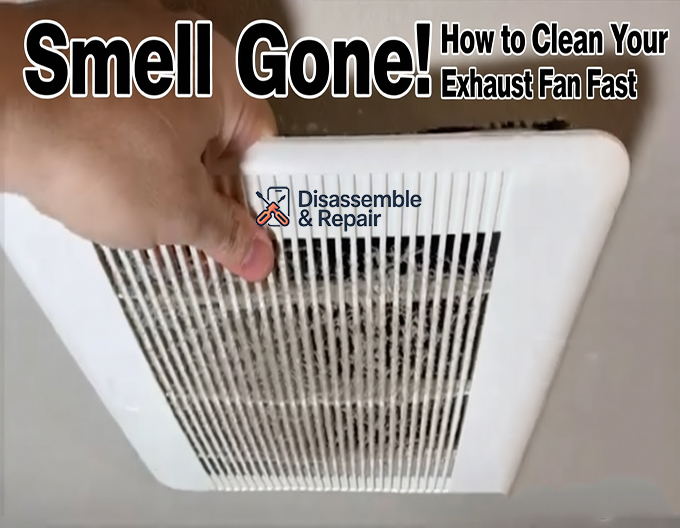
Remove the Fan Cover
Most exhaust fan covers are either held by spring clips or a central screw.
- For spring-loaded covers: Gently pull down on the cover from the sides until it hangs slightly. You’ll see two metal spring clips. Squeeze these clips together and carefully pull the cover downwards and away from the fan housing.
- For screw-mounted covers: Locate the central screw (often hidden under a decorative cap) and unscrew it. Gently lower the cover.
- If your cover has a light, you’ll need to disconnect the wire connector before completely removing the cover.
Deep Clean the Fan Cover
This part often accumulates the most visible grime.
- For covers without lights: Fill a sink or bucket with warm, soapy water (using mild dish soap). Soak the cover for a few minutes to loosen grime, then scrub it with a soft brush or sponge. Rinse thoroughly and let it air dry completely before reinstallation.
- For covers with lights: Do not submerge it in water. Instead, vacuum off loose dust with a brush attachment, then wipe it clean with a damp cloth lightly sprayed with an all-purpose cleaner. Dry thoroughly.
Accessing the Fan Motor and Blades
With the cover removed, you’ll see the fan blades and motor assembly inside the housing.
- Use your vacuum’s brush and crevice attachments to remove as much loose dust and debris as possible from the fan blades, motor, and inside the housing. Be gentle to avoid bending the blades or damaging wires.
- For caked-on dust, use a soft-bristled brush (like an old toothbrush) to gently dislodge it, then vacuum it up. You can also use compressed air for hard-to-reach spots, but it’s best to take the fan outside for this to avoid spreading dust around your bathroom.
- For a deeper clean, consider removing the fan motor. This allows for unparalleled access to the blades and housing. While seemingly daunting, it’s often straightforward. Most fan motors are held in place by two or three screws and a power connector.
- First, unplug the motor’s power connector.
- Next, remove the mounting screws holding the motor to the housing, supporting the motor as you remove the last screw.
- Once removed, you can take the motor and blades to a well-ventilated area (like outdoors) to vacuum and brush away all accumulated grime. You may even be able to gently wipe blades with a damp, soapy cloth, being very careful not to get the motor wet. Let it dry completely.
(For detailed instructions on full fan removal, including ducting, you can consult resources like How to remove bathroom exhaust fan to clean.)

Thoroughly Clean Fan Blades and Housing
If you didn’t remove the motor, focus on cleaning in place.
- Use a damp microfiber cloth lightly sprayed with a mild cleaning solution to wipe down the fan blades and the interior of the fan housing. Be careful not to get any electrical components excessively wet.
- Use a crevice tool on your vacuum to reach into corners and tight spaces where dust loves to hide.
Reassemble and Restore Power
- Once all components are clean and completely dry, carefully reassemble the fan. If you removed the motor, reverse the steps to reinstall it, ensuring all screws are secure and the power connector is reattached.
- Reattach the fan cover, securing it with its screws or spring clips. If your cover has a light, reconnect the wiring harness before pushing the cover into place.
- Finally, return to your electrical panel and flip the circuit breaker back on. Test the fan to ensure it’s working properly.
Maintaining Freshness: Quick Fan Maintenance Tips
To keep your bathroom fan running efficiently and prevent future odor buildup, regular, quick fan maintenance is key:
- Run the fan consistently: Use your fan during every shower or bath and let it run for at least 15-20 minutes afterward to fully clear moisture. You can also run it when using the toilet.
- Weekly dusting: Quickly wipe down the exterior of the vent cover with a microfiber cloth to remove visible dust.
- Monthly vacuum touch-up: Use your vacuum’s brush attachment to quickly vacuum the visible parts of the fan cover and around the grille.
- Check airflow: A simple “paper test” can gauge efficiency. Hold a piece of toilet paper near the fan; if it sticks, airflow is strong. If it falls, cleaning is needed.
Aim for a thorough clean of your exhaust fan every 3 to 6 months, or more frequently if your bathroom sees heavy use or is particularly humid.
Beyond the Fan: Holistic Odor Removal Strategies
While a clean exhaust fan is paramount, other strategies can complement your efforts to maintain a perpetually fresh bathroom:
- Deep clean your bathroom regularly: Focus on areas prone to bacteria and odor, such as the toilet, grout, and drains.
- Improve general ventilation: Open windows and doors (when practical) to allow fresh air circulation.
- Use natural odor absorbers: Bowls of baking soda or white vinegar can absorb ambient odors. Replace them periodically.
- Essential oils and diffusers: While not eliminating odors, they can provide a pleasant fragrance.
- Check for plumbing issues: Lingering sewage smells might indicate a deeper problem like a dry trap, blocked vent stack, or a failing wax ring on the toilet, which would require professional attention.
Conclusion: Breathe Easy, Enjoy a Fresh Bathroom
A smelly bathroom is more than just an inconvenience; it can be a sign of poor air quality and potential moisture damage. By following this comprehensive guide, you can quickly and effectively clean your bathroom exhaust fan, addressing the root cause of many unpleasant odors. Regularly scheduled cleaning and maintenance will not only eliminate bathroom smell but also improve your indoor air quality, enhance fan efficiency, and extend the life of your appliance. Take control of your bathroom’s freshness today and breathe easier tomorrow!
FAQ
Why does my bathroom exhaust fan smell bad?
Your bathroom exhaust fan can develop unpleasant odors due to the accumulation of airborne particles like dust, lint, hair, and moisture. As the fan draws air, these elements collect and create a build-up that leads to musty, stale, or foul smells.
How often should I clean my bathroom exhaust fan?
For efficient operation and to maintain a fresh bathroom, it is recommended to clean your exhaust fan regularly, ideally every 3-6 months.
What is the most crucial safety step before cleaning my exhaust fan?
The most important safety step is always to cut power to the exhaust fan at the circuit breaker before you begin any cleaning or maintenance work.
What are the main benefits of cleaning my bathroom exhaust fan?
Cleaning your exhaust fan offers several benefits, including significantly eliminating lingering bathroom odors, improving overall air quality, and ensuring the fan operates efficiently by preventing the accumulation of dust, grime, and moisture.


