Learning how to remove bathroom fan cover no screws is a simple yet essential skill for maintaining a clean and efficient ventilation system. Over time, dust and moisture clog the grille assembly, but with the right technique, you can detach it in seconds without reaching for a toolbox.

Safety Precautions Before You Begin
Before attempting to remove the cover, safety must be your priority.
- Turn off the power: Switch off the circuit breaker that controls the bathroom fan motor. Even if you are just cleaning, you will be working near electrical components.
- Secure your footing: Use a sturdy stepladder. Do not stand on the toilet or bathtub rim, as these surfaces are slippery and unstable.
- Protect your eyes: Dust and debris often fall from the ceiling housing when the cover is disturbed. Wear safety glasses to prevent eye irritation.
How to Remove Bathroom Fan Cover No Screws: The 3 Main Methods
Most screwless covers rely on hidden mechanisms like tension springs, mounting brackets, or plastic tabs. Identify your cover type below to find the correct removal method.
Method 1: The Tension Spring Mechanism (Most Common)
This is the standard design for most Broan-NuTone and generic exhaust fans. The cover is held tight against the ceiling by two V-shaped metal wires called torsion springs.
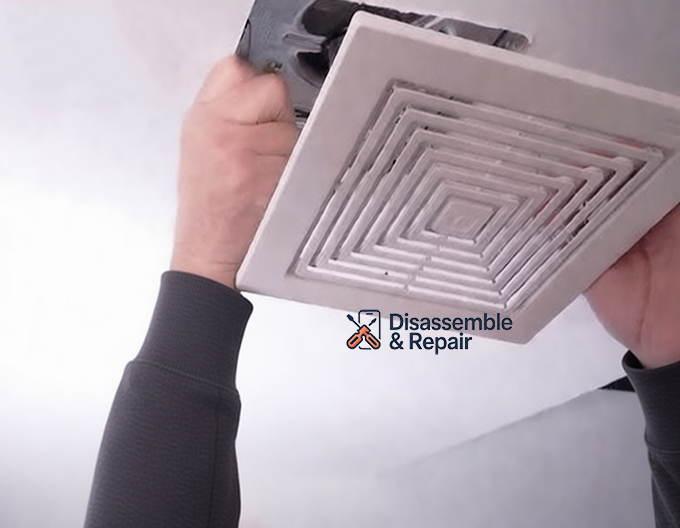
- Pull Down Gently: Grasp two opposite edges of the grille assembly. Pull the cover straight down about 1 to 2 inches. You will feel resistance from the springs.
- Locate the Springs: Look into the gap between the cover and the ceiling. You will see two metal legs (the tension springs) inserted into slots in the ceiling housing.
- Squeeze the Springs: Reach in and squeeze the two legs of the spring clip together with your fingers. This releases tension and allows the clip to slide out of the mounting bracket slot.
- Repeat: Do this for the spring on the opposite side. The cover will now be fully detached.
Method 2: The Center Nut Method (Fans with Lights)
If your exhaust fan has a built-in light, the grille is often secured by a single nut hidden behind the light lens.
- Remove the Light Lens: Locate the plastic light lens in the center of the grille.
- For plastic tabs: Squeeze the sides of the lens gently to release the plastic tabs from the grille assembly.
- For twist-lock: If there are no tabs, place your palm against the lens, push up slightly, and twist counter-clockwise to unlock it.
- Locate the Fastener: Once the lens is off, look for a nut or a threaded rod securing the reflector and grille to the motor bracket.
- Unscrew the Nut: Unscrew this mounting nut by hand (or with pliers if it’s tight).
- Lower the Assembly: The grille assembly should now drop down freely. Be careful to unplug the light’s power connector before pulling it completely away.
Method 3: Plastic Snap-In Clips
Some modern, low-profile fans use hidden plastic clips around the perimeter of the cover.
- Test the Edges: Gently pry the edge of the cover with your fingertips.
- Locate the Snaps: Slide your fingers along the rim to find where the resistance is strongest—these are the clip locations.
- Release the Clips: Press inward on the cover near the clip or pull down firmly (but carefully) to unsnap the metal clips or plastic tabs from the housing.
Troubleshooting Common Issues
The Cover is Stuck to the Ceiling
If the cover does not budge when you pull, it may be painted over.
- Solution: Take a utility knife and carefully score the paint seal around the perimeter of the cover. This breaks the bond between the grille and the drywall, allowing you to pull it down without tearing the ceiling paint.
Broken Springs or Clips
Old tension springs can snap, or plastic tabs may become brittle and break.
- Solution: Replacement springs and grille assemblies are widely available. If a spring slot in the ceiling housing is bent, use needle-nose pliers to straighten it so the new spring can seat properly.
Cleaning and Maintenance Tips
Once the cover is off, take the opportunity to improve your ventilation system‘s performance.
- Wash the Cover: Clean the plastic grille with warm, soapy water. Let it dry completely before reattaching.
- Dust the Motor: Use a vacuum with a brush attachment to gently remove dust from the bathroom fan motor and blower wheel. This prevents overheating and reduces noise.
By mastering these simple removal techniques, you can ensure your bathroom exhaust fan remains quiet, efficient, and free of unsightly dust buildup.
Frequently Asked Questions
Do I really need to turn off the power just to remove the cover?
Yes, safety is essential. Even if you are only removing the plastic grille for cleaning, you will be working in close proximity to the fan motor and electrical wiring. Turning off the circuit breaker prevents any risk of accidental electrical shock or injury if the fan were to turn on while your hands are near the blades.
What should I do if the cover feels stuck to the ceiling?
If the cover doesn’t budge when you pull, it is likely sealed to the ceiling by layers of old paint. To fix this, take a utility knife and carefully score the paint around the entire perimeter of the grille. This breaks the bond with the drywall and allows the cover to drop without damaging your ceiling’s paint job.
How do I reinstall a cover that uses tension springs?
Reinstalling is the reverse of removal. Squeeze the two metal legs of one V-shaped torsion spring together and insert them into the small slots located inside the fan housing. Repeat this for the second spring on the opposite side, then gently push the entire cover upward until it sits flush against the ceiling.
How often should I remove the cover for cleaning?
To maintain a healthy ventilation system, it is recommended to remove and clean the cover every six months. Removing the dust buildup from the grille and vacuuming the motor assembly helps the fan run more quietly, prevents the motor from overheating, and ensures moisture is effectively removed from the bathroom.