Understanding how to calibrate LG front load washer is a fundamental step for any homeowner wishing to ensure their appliance operates at peak efficiency and prevents unnecessary wear on the motor. By resetting the internal weight sensors, you ensure that the machine’s load detection logic is accurate, which directly influences water usage, cycle time, and energy consumption.
In the realm of modern laundry appliances, the LG front load washer stands out for its advanced technology and smart features. However, like any precision instrument, it requires occasional fine-tuning. This guide will walk you through the technical necessity of calibration, the preparation required, and the specific steps to reset your machine’s sensors.
The Science Behind Calibration Mode
Before diving into the manual steps, it is vital to understand what the calibration mode actually does. Modern LG washers do not just blindly fill with water; they utilize sophisticated weight sensing technology. When you start a cycle, the drum rotates briefly before water enters. During this time, the motor detects the resistance and inertia of the load.
If the washer is not calibrated correctly, the load detection system may misinterpret the weight of your laundry. This leads to two primary issues:
- Inefficiency: The machine may use too much water and energy for a small load.
- Performance Failure: The machine may underestimate a heavy load, leading to inadequate spinning power or failure to balance the drum before high-speed spins.
Regular calibration ensures the digital display reflects accurate cycle times and that the internal logic board applies the correct parameters for the spin cycle.
Pre-Calibration: Safety and Setup
You cannot simply jump into button combinations without preparing the physical unit. The success of the calibration depends entirely on the machine’s physical stability.
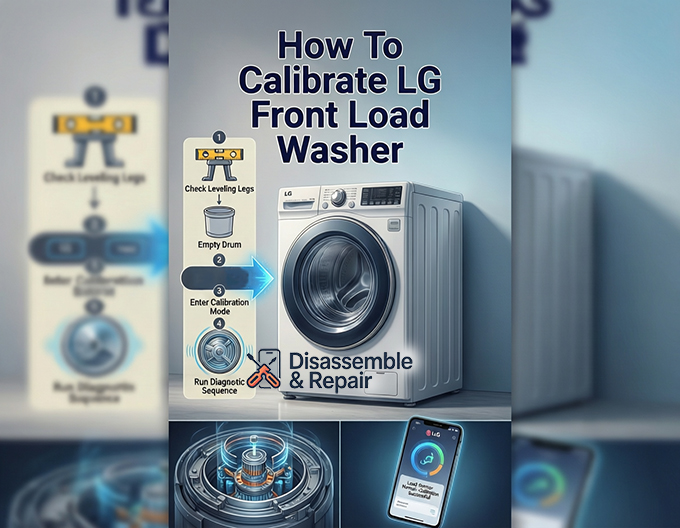
Check the Leveling Legs
The most common cause of calibration failure or persistent vibration is an unlevel machine. Refer to your installation guide to locate the wrench provided with your washer.
- Place a carpenter’s level on top of the washer.
- Check both the side-to-side and front-to-back leveling.
- Adjust the leveling legs at the bottom of the unit. They should be firm against the floor. If one leg is loose, the drum balance will be compromised during the sensing phase.
- Tighten the locking nuts against the base of the washer to secure the legs in place.
Inspect the Drum
For the weight sensing mechanism to reset to its “zero” state, the drum must be completely empty.
- Remove all clothing, detergent pods, and debris.
- Check the door seal for small items like coins or socks.
- Ensure the drum rotates freely by hand without grinding noises.
Step-by-Step Guide: How to calibrate LG front load washer
This section outlines the standard procedure for most LG models. While button configurations can vary slightly depending on the year of manufacture, the underlying logic remains consistent.
Read more LG washer leaking from drain pump filter
Step 1: Power Preparation
Ensure the washer is plugged into a grounded outlet. If the machine was recently running, turn it off and wait for 10 seconds to allow the capacitors on the main board to discharge slightly.
Step 2: Enter Calibration Mode
To access the system settings, you must use a specific key combination on the control panel.
- Power On: Press the Power button to turn the washer on.
- The Key Combo: Immediately press and hold the Temp and Delay End buttons simultaneously.
- Note: On some newer models with touch interfaces, this might be the Spin and Soil buttons. Consult your user manual if the standard combination does not trigger the mode.
- Hold: Keep holding the buttons until the digital display changes.
Step 3: Verify the Display Code
Once you have successfully entered the mode, the display usually shows “Cb” (Calibration) or a similar unique identifier. This indicates the machine is ready to run the diagnostic and resetting sequence.
Step 4: Initiate the Sequence
Press the Start/Pause button. The door will lock, and the drum will begin to rotate.
- Do not disturb the machine. The washer is currently measuring the motor’s feedback to establish a baseline for an empty drum.
- The drum will rotate clockwise and counter-clockwise at varying speeds. This is normal.
Step 5: Completion
The process typically takes 1 to 3 minutes. Once the drum balance and weight sensors are zeroed out, the machine will automatically power off, or the display will show “End.”
Step 6: Final Verification
Turn the washer back on and run a short “Rinse + Spin” cycle with no clothes to ensure the machine operates smoothly without excessive vibration reduction errors.
Troubleshooting Common Issues
Even with a successful calibration, you may encounter issues if there are underlying mechanical faults.
Read more LG washing machine PS error
The uE Error Code
The uE error code stands for “Unbalanced Error.” If this appears shortly after calibration during a wash cycle, it indicates the machine cannot distribute the clothes evenly.
- Cause: This is often not a sensor issue but a user error (washing a single heavy item like a blanket) or a mechanical failure in the suspension rods.
- Solution: Redistribute the load manually. If the error persists with an empty drum spin, the leveling legs may have shifted, or the calibration needs to be redone.
Excessive Vibration
If calibration is done on a machine that is not level, the vibration reduction system will work overtime, potentially shortening the life of the dampers. Always re-check the floor stability. If your laundry room floor is not reinforced, the sensors may struggle to calibrate correctly due to floor flex.
Smart Diagnostics with LG ThinQ
Modern LG washers are equipped with LG ThinQ technology, which bridges the gap between manual maintenance and digital diagnostics. If you are unsure if you performed the calibration correctly, or if the machine is behaving erratically, the app can provide insight.
- Connect: Sync your washer to the LG ThinQ app via Wi-Fi.
- Smart Diagnosis: Use the “Smart Diagnosis” feature within the app. This pulls data directly from the washer’s computer.
- Status Check: The app can tell you if the load sensors are returning abnormal values, prompting you to recalibrate or contact a technician.
Using the app is often more accurate than listening for noises because it reads the electrical current fluctuations in the motor, providing a precise health check of the weight sensing system.
Maintenance Tips for Long-Term Accuracy
Calibration is not a “do it once and forget it” task. To maintain the accuracy of the load detection system, consider the following schedule:
- Post-Installation: Always calibrate immediately after installing a new washer.
- After Moving: If you move the washer to a new home or even just slide it out to clean behind it, you must relevel and recalibrate.
- Quarterly Check: If you wash heavy bedding frequently, perform a calibration every 3 to 6 months to account for any settling of the suspension springs.
Protecting the Control Panel
Avoid spraying water directly on the control panel when cleaning. Moisture intrusion can corrode the contacts behind the buttons used for calibration (Temp/Delay End), making it difficult to enter the mode in the future. Clean with a damp microfiber cloth only.
Conclusion
Proper maintenance of your appliance goes beyond cleaning the lint filter and wiping the door seal. Knowing how to calibrate LG front load washer empowers you to maintain the machine’s “brain,” ensuring that it interprets every load of laundry correctly.
By keeping the leveling legs secure, the drum empty during the process, and utilizing the LG ThinQ app for backup diagnostics, you can eliminate the uE error code and ensure whisper-quiet operation. This simple, three-minute procedure protects your investment, lowers your utility bills through accurate load detection, and guarantees that your clothes receive the specific care they were designed to receive.
Read more How to hard reset LG washer
Frequently Asked Questions
How often should I calibrate my LG washer?
You should calibrate the washer upon initial installation, any time you move the machine, and if you notice the time on the digital display fluctuating wildly during a cycle.
Will calibration fix the uE error code?
It can help. If the weight sensors are off, the machine might think a balanced load is unbalanced. However, uE errors are also caused by washing single heavy items or uneven flooring.
Can I calibrate with wet clothes inside?
No. The weight sensing technology requires an absolute zero baseline. The drum must be completely empty and dry for accurate calibration.
What if the key combination doesn’t work?
LG manufactures many models. If “Temp + Delay End” does not work, consult your specific installation guide or search for your model number on the LG support site. Common alternatives include “Spin + Soil” or “Pre-Wash + Delay Wash.”
Does calibration affect the water level?
Yes. The washer determines how much water to add based on the weight of the dry clothes. Accurate calibration ensures the correct water level for the specific load size.


