Maintaining optimal ventilation in your bathroom is essential for comfort, hygiene, and durability of the space. When a bathroom exhaust fan stops working efficiently or completely fails, the culprit often points to a faulty motor. Bathroom exhaust fan motor replacement is a crucial task that homeowners can undertake with proper knowledge and tools to restore air quality and prevent mold or moisture buildup. This article provides a detailed, step-by-step guide on how to replace the motor, along with insights into troubleshooting, choosing the right replacement, and ensuring safety – making the process accessible for DIY enthusiasts and professionals alike.
Understanding the Importance of a Properly Functioning Bathroom Exhaust Fan Motor
The bathroom exhaust fan plays a vital role in removing humidity, odors, and airborne contaminants. The motor is the component responsible for powering the fan blades, creating the airflow necessary to ventilate the space. Over time, the motor can wear out due to continuous use, dust accumulation, or electrical issues, leading to reduced performance or complete failure.
Replacing the bathroom exhaust fan motor is not merely about restoring a device—it’s about maintaining a healthy living environment. Inadequate ventilation can cause mold growth, wood rot, and unpleasant odors that diminish the comfort of your home. Therefore, understanding the significance of a well-functioning motor helps motivate homeowners to take proactive steps in the maintenance and timely replacement of faulty parts.
The process begins with recognizing symptoms of a malfunctioning motor, such as strange noises, the fan not operating, or intermittently stopping. These signs indicate that a replacement may be necessary, and timely action can prevent further damage to the fan assembly or the surrounding structure.
The replacement process will involve identifying the correct motor type, disconnecting power safely, removing the faulty motor, and installing a compatible new unit. Each of these steps demands attention to detail, safety precautions, and a basic understanding of electrical components, which this guide aims to clarify comprehensively.
Diagnosing Your Bathroom Exhaust Fan for Motor Issues
Before jumping into a replacement, it’s essential to accurately diagnose whether the motor is indeed at fault or if other components are causing the problem. Proper diagnosis can save time and resources while ensuring you address the right issue.
Recognizing Signs of a Faulty Motor
When examining your bathroom exhaust fan, pay attention to specific symptoms. Often, a malfunctioning motor exhibits a combination of the following:
- The fan runs intermittently or not at all, despite the switch being on.
- Unusual noises like grinding, squeaking, or buzzing when the fan is operating.
- The fan runs but doesn’t produce airflow or exhaust odors effectively.
- The motor feels excessively hot to the touch during operation.
- There’s visible damage or burned smell near the motor or wiring.
These signs often point to motor failure, but electrical faults, faulty switches, or obstructions can mimic these symptoms. Conducting a thorough diagnosis helps pinpoint the issue precisely.
Testing the Motor and Electrical Components
To verify if the motor is to blame, conduct simple tests. First, turn off power supply at the circuit breaker for safety. Then, access the fan motor, typically located behind the fan grille.
Using a multimeter, measure the resistance across the motor’s terminals. An open circuit indicates the motor windings are broken. Alternatively, check whether the motor receives power; if voltage is present but the motor doesn’t turn, the motor is likely faulty.
Physical inspection also reveals clues: look for burned wires, corrosion, or debris buildup that may interfere with motor function. Sometimes, cleaning the motor or replacing worn brushes or bearings can extend its life, but if damage is extensive, a replacement becomes necessary.
Understanding these diagnostic steps ensures that you invest in bathroom exhaust fan motor replacement only when truly needed, avoiding unnecessary costs. Once confirmed, proceed with the necessary safety precautions and plan the replacement process accordingly.
Step-by-Step Guide to Replacing Your Bathroom Exhaust Fan Motor
Replacing a bathroom exhaust fan motor requires a systematic approach that includes safety measures, proper tools, and careful disassembly. Below is an in-depth guide designed to lead you through each step.
Preparing for the Replacement Process
Before starting, gather all necessary tools: screwdriver, multimeter, wire stripper, replacement motor compatible with your model, wire connectors, and safety gear such as gloves and safety glasses. Turn off the main power supply to prevent electrical shock. Confirm that the power is off by testing the fan switch and using a multimeter across the wires.
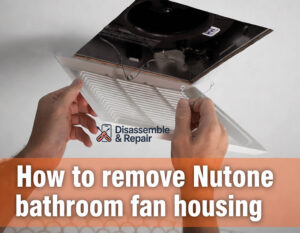
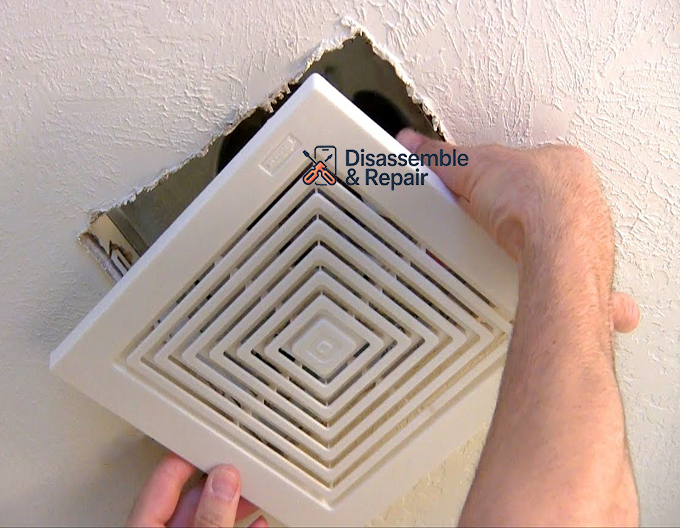
Carefully remove the fan grille or cover, often secured by clips or screws, to access the motor. Take photos at each step to document wiring configurations, as this will aid during reassembly. Inspect the mounting area for any damage and clean the surrounding area from dust or moisture.
Disconnecting and Removing the Faulty Motor
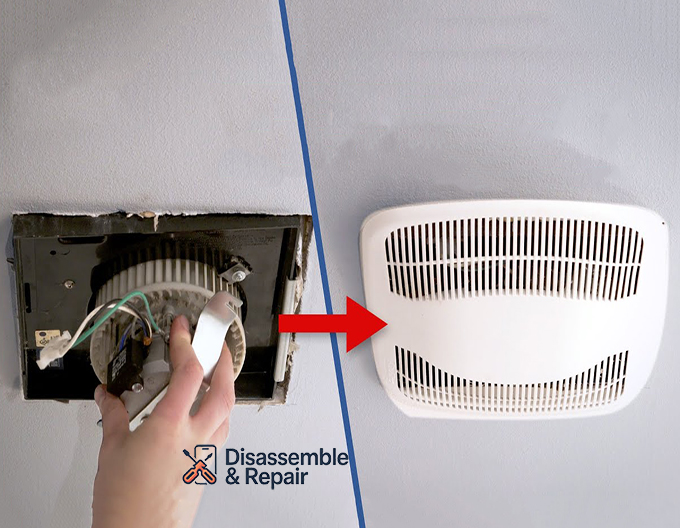
Once access is clear, disconnect the wiring harness or individual wires connected to the motor terminals. Loosen any mounting screws or brackets securing the motor assembly. Carefully disconnect the motor from the fan blade or housing, noting how it is attached for easier reinstallation.
If the motor is held in place with brackets or clips, release or unscrew them carefully. Remove the faulty motor, ensuring no leftover debris interferes with the new installation. Clean the motor mounting area and prepare it for the new motor.
Installing the New Motor and Final Checks
Position the new bathroom exhaust fan motor in the same location as the previous unit. Secure it with the screws or brackets used earlier. Reconnect the wiring according to the photos taken or the wiring diagram provided with the replacement motor. Ensure all connections are secure and properly insulated with wire connectors.
Double-check everything—wiring, mounting, and clearance—before restoring power. Turn the circuit breaker back on and test your installation. The fan should spin smoothly without unusual noises or vibrations, and airflow should be restored effectively. If everything functions correctly, reassemble any covers or grilles, and your replacement is complete.
Correct installation of the motor ensures longevity and efficient operation, emphasizing the importance of patience and precision during this process, especially for those undertaking DIY repairs.
Troubleshooting Common Issues After Motor Replacement
Even with proper installation, some problems may arise post-replacement. Troubleshooting helps address these issues promptly to maintain optimal ventilation.
Dealing with Electrical Compatibility Issues
One common challenge is ensuring the new motor is compatible with your existing wiring and control system. Mismatched voltages or wiring configurations can lead to motor failure or safety hazards.
First, verify that the replacement motor’s specifications match your original equipment. Check voltage ratings, horsepower (if applicable), and connector types. If your wiring is incompatible, consider consulting a professional electrician to adapt the system safely.
Inspect the wiring connections thoroughly for loose or broken wires. Use a multimeter to confirm continuity and correct voltage supply. If the motor runs inconsistently, it could be due to inadequate power or faulty wiring connections that need correction.
Ensuring Proper Airflow and Ventilation
Sometimes, after replacement, airflow may seem inadequate. This might relate to improper installation, blocked vents, or fan blade misalignment.
Ensure the fan blades are securely attached and aligned properly with the motor shaft. Obstructions like dust, debris, or accumulated lint in exhaust ducts can hinder airflow, reducing ventilation efficiency despite a functioning motor.
Regular maintenance, including cleaning ducts and verifying that vents are unobstructed outside the home, preserves optimal airflow. If airflow remains weak, reassess the motor’s position, wiring, and whether the fan blades are balanced and free from damage.
Addressing Noise and Vibration
Uneven or loud operation often signals issues with motor mounting, fan blade balancing, or worn bearings. Tighten any loose mounting screws and verify that the motor is seated firmly.
Balance the fan blades if they are bent or uneven, and replace worn bearings or brushes if possible. Using vibration dampers or rubber mounts can minimize noise transmission from the motor to the housing.
In summary, troubleshooting after bathroom exhaust fan motor replacement involves a combination of ensuring electrical compatibility, maintaining unobstructed airflow, and minimizing operational noise—all of which contribute to a more efficient and durable setup.
FAQs About Bathroom Exhaust Fan Motor Replacement
How do I know if my bathroom exhaust fan needs a new motor?
If your fan makes unusual noises, runs intermittently or not at all, or shows signs of overheating, these are indicators that the motor may be failing. Conducting electrical tests and physical inspections helps confirm the issue.
Can I replace the bathroom exhaust fan motor myself?
Yes, with basic electrical knowledge, the right tools, and safety precautions, homeowners can replace their bathroom fan motors. However, complex wiring or outdated systems might require professional assistance.
What factors should I consider when choosing a new motor?
Ensure the replacement motor matches the specifications of your existing fan—voltage, horsepower, mounting style, and connector type. Consulting the manufacturer’s guide or a professional can help select the right part.
How long does a bathroom exhaust fan motor usually last?
Most motors last between 10 to 15 years with proper maintenance. Regular cleaning and timely repairs can extend their lifespan, but replacement becomes necessary when signs of failure appear.
Is it necessary to replace the entire fan when the motor fails?
Not necessarily. If the motor is the only faulty component and the fan blades and housing are intact, replacing just the motor is cost-effective and practical, saving time and resources.
Conclusion
Replacing a bathroom exhaust fan motor is a vital maintenance task that ensures your bathroom remains a fresh, safe, and mold-free environment. By understanding the role of the motor, diagnosing problems accurately, and following a structured replacement process, homeowners and DIY enthusiasts can successfully restore operating efficiency and prolong the lifespan of their ventilation system. Proper troubleshooting after installation guarantees optimal airflow, reduced noise, and energy efficiency, making the effort worthwhile. Regular upkeep and timely motor replacements contribute significantly to maintaining a comfortable and healthy home environment.