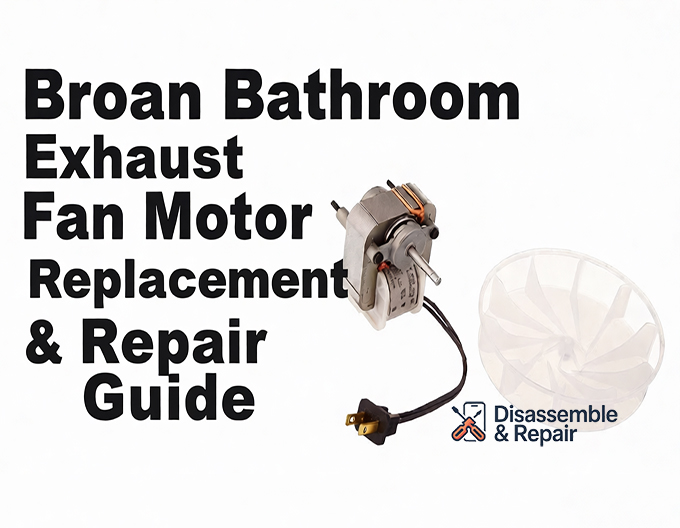
If your bathroom ventilation system has become noisy or ineffective, a Broan Bathroom exhaust Fan Motor Replacement is often the most cost-effective solution to restore proper air quality. Instead of ripping out drywall to install a completely new housing, you can simply swap out the internal components to improve humidity control and reduce noise.
As a Senior SEO Specialist and home improvement expert, I have compiled this detailed guide to help you identify the correct parts, understand critical specifications like CFM and Sones, and execute a flawless motor swap.
Understanding Your Ventilation Needs
Before ordering a replacement kit, it is crucial to understand the metrics that define your fan’s performance. Two primary ratings will determine comfort and efficiency:
- CFM Rating (Cubic Feet per Minute): This measures airflow capacity. A standard bathroom requires 1 CFM per square foot of floor space. If your mirror fogs up during a shower and stays foggy for more than 5 minutes afterward, your current fan may have an insufficient CFM rating.
- Sone Level: This measures sound output. Older builder-grade fans often operate at 4.0 Sones or higher, which can sound like a small airplane. Modern upgrade kits can lower this to a whisper-quiet 0.5 to 1.5 Sones.
Signs You Need a Broan Bathroom Exhaust Fan Motor Replacement
Bathroom ventilation is essential for preventing mold growth and structural damage. Watch for these distinct signs that your motor assembly is failing:
- Excessive Noise: Grinding, screeching, or rattling sounds usually indicate worn bearings in the motor or a blower wheel that has become unbalanced.
- Poor Humidity Control: If moisture lingers on walls and mirrors long after you’ve left the room, the fan is no longer moving air efficiently.
- Slow Startup: A motor that hums but takes a while to spin up likely has a failing capacitor or seized bearings.
- Complete Failure: If the switch is on but the fan is silent and stationary, the motor windings may have burnt out.
Step-by-Step Guide: Broan Bathroom Exhaust Fan Motor Replacement
This process is generally straightforward and can be completed in under 30 minutes with basic tools.
Step 1: Safety and Preparation
Always prioritize safety. Turn off the circuit breaker controlling the bathroom fan. Verify the power is off by flipping the wall switch.
Step 2: Identify Your Model Number
To find the correct Broan Bathroom exhaust Fan Motor Replacement, you must know your current model.
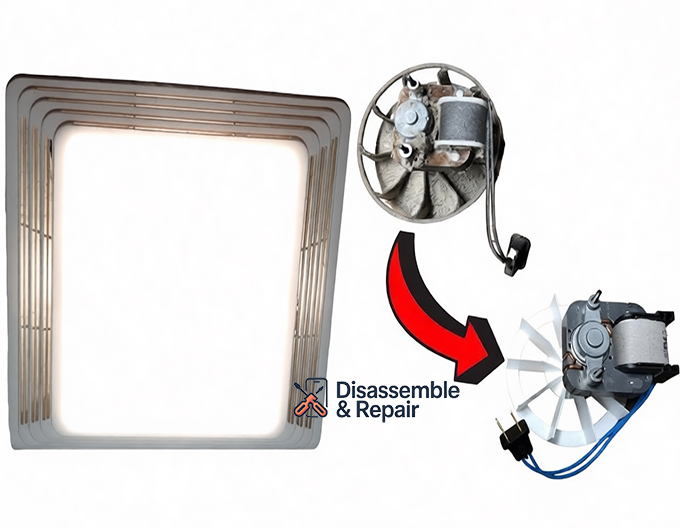
- Remove the plastic grille by pulling it down gently and squeezing the metal mounting springs.
- Look inside the metal housing. You will see a manufacturer’s label or a stamp on the motor plate.
- Note the model number (e.g., Broan 688, 671, or NuTone 696N).
Step 3: Remove the Old Motor Assembly
Most Broan fans feature a plug-in motor design, which simplifies removal.
- Unplug the motor’s black power cord from the small receptacle inside the housing.
- Locate the tab or screw holding the motor bracket to the housing.
- If it is a tab-mount, insert a flathead screwdriver into the slot and twist to release the plate. If it uses a screw, remove it with a screwdriver.
- Lower the entire assembly (motor, bracket, and blower wheel) out of the ceiling.
Step 4: Clean the Housing
Before installing the new part, use a vacuum to remove years of dust buildup from the housing and the damper flap. A clean airway is critical for maintaining the specific CFM rating.
Step 5: Install the Replacement Kit
You can choose an exact OEM replacement or a universal replacement kit (like the Broan QuickKit).
- If you bought just the motor, you might need to transfer the old mounting bracket and blower wheel to the new motor shaft. However, purchasing a full assembly is recommended to ensure the blower wheel is balanced.
- Insert the new motor assembly into the housing.
- Secure the motor bracket into the slots or fasten it with the screw you removed earlier.
- Spin the blower wheel by hand to ensure it spins freely and does not hit the side of the housing.
Step 6: Final Connection and Testing
- Plug the new motor into the receptacle.
- Restore power at the breaker.
- Turn on the switch. Listen for a smooth hum and check for air suction (holding a piece of toilet paper near the fan is a quick test).
- Reattach the grille.
Broan vs. NuTone: Are They Compatible?
Many homeowners are confused by the relationship between Broan-NuTone. Broan acquired NuTone years ago, and today, many parts are interchangeable. A Nutone fan motor often uses the exact same frame and mounting style as a Broan equivalent.
For example, the popular Broan 688 and NuTone 696N often share compatible motor assemblies. However, always cross-reference your model number with the manufacturer’s compatibility list to ensure the shaft length and plug style match.
Upgrading for Better Performance
You don’t always have to replace like-for-like. Several “upgrade” replacement kits allow you to increase airflow or reduce noise without changing the ceiling housing.
- CFM Upgrade: Moving from 50 CFM to 60 or 80 CFM can significantly improve humidity control in larger bathrooms.
- Sone Reduction: Upgrading to a premium motor can drop sound levels from an intrusive 4.0 Sones to a comfortable 2.5 Sones or lower.
Troubleshooting Common Installation Issues
The new fan is noisy:
- Check if the blower wheel is rubbing against the housing. Adjust the bracket if necessary.
- Ensure the motor bracket is snapped in securely; loose brackets cause vibration.
The fan runs but doesn’t pull air:
- Check the damper flap inside the duct connector. If it is stuck closed, air cannot escape outside.
- Verify the ducting isn’t crushed or blocked by insulation in the attic.
The replacement motor doesn’t fit:
- You may have purchased a motor with the wrong stack height or shaft length. Always measure the old motor’s physical dimensions if the model number was unreadable.
Maintenance Tips for Longevity
To extend the life of your new Broan Bathroom exhaust Fan Motor Replacement:
- Clean Regularly: Vacuum the grille and motor assembly every six months. Dust accumulation causes overheating and bearing failure.
- Check the Damper: Ensure the back-draft damper opens freely to prevent motor strain.
- Timer Switch: Install a timer switch to ensure the fan runs for 20 minutes after a shower, fully removing residual moisture without running all day.
By following this guide, you can ensure your bathroom remains dry, fresh, and quiet. Replacing the motor is a sustainable, DIY-friendly project that saves money and improves the comfort of your home.
Frequently Asked Questions
How do I find the correct model number for my replacement motor?
To identify your specific model, remove the plastic grille by pulling it down and squeezing the metal springs. Look inside the metal housing for a manufacturer’s label or a stamp located on the motor plate. Common examples include Broan 688, 671, or NuTone 696N. Knowing this number is essential for ensuring the new motor, shaft length, and plug style match your existing setup.
Can I use Broan and NuTone parts interchangeably?
Yes, in many instances. Because Broan and NuTone are the same company, many of their motor assemblies use the identical frame and mounting style. For example, the Broan 688 and NuTone 696N often share compatible parts. However, you should always cross-reference your specific model number with the manufacturer’s compatibility list before purchasing.
What is the difference between CFM and Sones?
CFM (Cubic Feet per Minute) measures the airflow capacity, or how much air the fan can move; a standard bathroom requires 1 CFM per square foot. Sones measure the sound output of the fan. While older fans often have a loud rating of 4.0 Sones or higher, modern replacement kits can reduce this to a much quieter level of 0.5 to 1.5 Sones.
Why should I replace the motor instead of the entire fan housing?
Replacing the motor assembly is significantly more cost-effective and less invasive than a full installation. Swapping the internal components allows you to improve humidity control and reduce noise without having to rip out drywall, alter ducting, or work extensively within the attic space.
Why is my new replacement fan making a grinding or vibrating noise?
If a newly installed motor is noisy, the blower wheel may be rubbing against the side of the metal housing, or the motor bracket may not be snapped securely into its slots. Check to ensure the bracket is fastened tightly and spin the blower wheel by hand to verify it rotates freely without obstruction.


