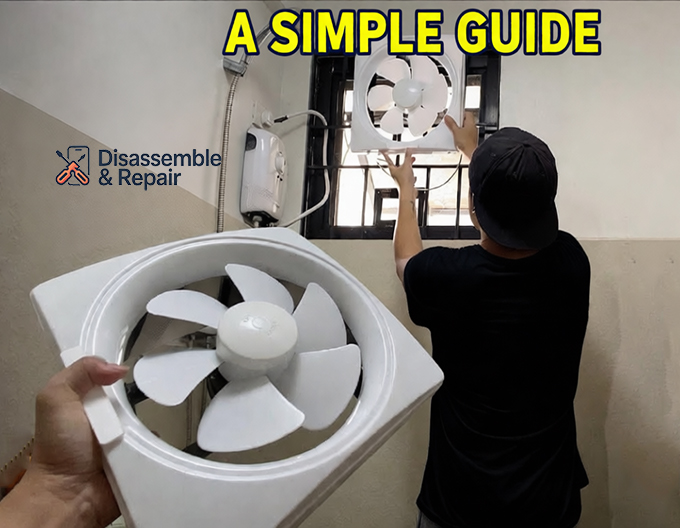
How hard is it to replace bathroom fan units yourself? For most homeowners with basic DIY skills, the answer ranges from a simple one-hour task to a moderate afternoon project, depending largely on your access to the ceiling joists.
While a direct motor swap is beginner-friendly, a full unit replacement can become complex if you encounter ductwork mismatch or lack attic access. This guide breaks down the complexity levels, necessary preparations, and professional steps to ensure proper ventilation and moisture control in your home.
How hard is it to replace bathroom fan: Assessing the Difficulty
To honestly answer “how hard is it to replace bathroom fan,” we must look at three distinct scenarios. The difficulty level is not universal; it relies heavily on what you find when you remove the grille.
Level 1: The Motor Swap (Easy)
- Time: 30–60 minutes
- Skill Level: Beginner
- If your housing unit is in good condition and you can find a compatible motor/blower assembly, you don’t need to remove the metal box from the ceiling. You simply unplug the old motor, release it from the mounting plate, and snap the new one in. No drywall cutting or attic work is required.
Level 2: Full Replacement with Attic Access (Moderate)
- Time: 2–4 hours
- Skill Level: Intermediate
- If you have access to the attic above the bathroom, the job is straightforward. You can easily reach the mounting bracket, disconnect the ductwork, and unscrew the housing from the joists. The main challenge here is working in a potentially cramped or insulated space and ensuring the new fan is centered in the existing rough-in opening.
Level 3: “Blind” Replacement (No Attic Access) (Hard)
- Time: 3–5 hours
- Skill Level: Advanced
- Replacing a fan entirely from below (room-side installation) is the most challenging scenario. You must carefully cut drywall, manipulate electrical connections through a small hole, and often use special retrofit brackets or “old work” hanger bars. If the new fan housing is smaller than the old one, you will also face the difficult task of patching drywall on the ceiling.
Critical Specifications: Sizing Your Fan Correctly
Before you unscrew a single wire, you must choose a fan that fits your needs. Ignoring these metrics will make the installation harder and the result less effective.
CFM (Cubic Feet per Minute)
This measures the fan’s power. A general rule is 1 CFM per square foot of bathroom area. For example, a 70-square-foot bathroom needs at least a 70 CFM fan. If your current fan leaves moisture on the mirror after a shower, upgrade to a higher CFM model.
Sone Rating
This measures loudness.
- 4.0 Sones: Very loud, like a standard television volume.
- 1.0 Sone or less: Very quiet, nearly silent.
- Pro Tip: Older builder-grade fans are often 3.0+ Sones. Upgrading to a fan with a lower Sone rating (0.5–1.0) is a massive quality-of-life improvement.
Ductwork Diameter
Most older fans use a 3-inch duct, while modern high-performance fans require a 4-inch or 6-inch duct.
- The Challenge: Connecting a new 4-inch fan outlet to an old 3-inch duct restricts air and increases noise.
- The Fix: You may need a duct reducer/adapter, though replacing the entire duct run is the best practice for optimal airflow.
Essential Tools and Safety Prep
Electrical wiring safety is paramount. Before touching any wires, locate your main electrical panel and turn off the circuit breaker labeled for the bathroom. Verify the power is off by flipping the fan switch and using a non-contact voltage tester.
Required Tools:
- Voltage tester
- Drywall saw (jab saw)
- Drill with Phillips bit
- HVAC foil tape (do not use standard duct tape)
- Wire strippers/nuts
- Stud finder
- Dust mask and safety goggles
Step-by-Step Installation Guide (Standard Room-Side)
If you are performing a “blind” replacement from inside the bathroom, follow these steps to manage the difficulty.
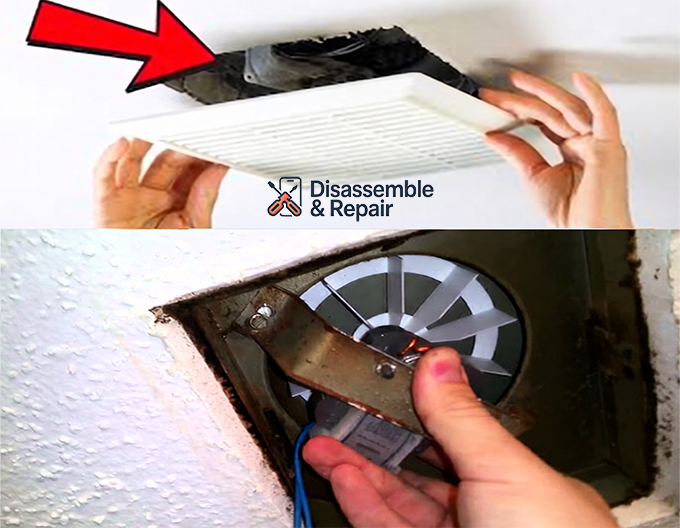
1. Remove the Old Unit
Pull down the plastic grille and pinch the spring clips to release it. Unplug the motor from the internal receptacle. Remove the screw holding the motor plate and pull the motor out. To remove the housing, look for screws driving into the joist. If it is nailed in, you may need to use a flat pry bar or cut the metal housing with tin snips to bend it away from the wood.
2. Prepare the Rough-in Opening
Measure your new fan’s housing dimensions.
- If the new fan is larger: Trace the template provided with your new fan onto the ceiling and use a drywall saw to enlarge the hole.
- If the new fan is smaller: This is tricky. You will need to install wood furring strips inside the ceiling cavity to screw the drywall patch into. It is often easier to buy a fan that is slightly larger than your existing hole to avoid this.
3. Connect Wiring and Ductwork
This is often the most frustrating part of a room-side install.
- Pull the house wiring through the fan’s junction box knockout before pushing the fan into the ceiling. Secure it with a cable clamp.
- Connect the ductwork to the fan’s outlet port using foil tape. Ensure the connection is airtight to prevent moist air from venting into your attic space, which can cause mold.
4. Secure the Housing
Push the fan assembly up into the ceiling. If your new fan has a “room-side” installation bracket, insert the bracket into the opening and expand it until it bites into the joists on both sides. If you are mounting directly to a joist, drive screws through the holes in the metal housing flange into the wood. Ensure the bottom edge of the fan is flush with the ceiling drywall.
5. Final Connections
Connect the electrical wiring: black to black (hot), white to white (neutral), and green/bare to the ground screw. Tuck the wires neatly into the junction box and replace the metal cover. Plug the blower motor into the internal housing outlet.
6. Finish
Install the new grille. Turn the circuit breaker back on and test the fan. A simple test is to hold a single square of toilet paper up to the grille; the suction should hold it in place if the fan is working correctly.
Troubleshooting Common Obstacles
“I can’t reach the duct to attach it.”
If the rigid duct pipe is too short or hard to reach from the small hole, attach a short 1-foot section of flexible aluminum duct to the fan housing first. Then, connect that flexible section to the rigid house duct. This gives you wiggle room to push the fan up without fighting the connection.
“The fan is vibrating or noisy.”
This often happens if the mounting bracket is loose or if the duct run is kinked. Ensure the housing is screwed tightly to the joist. If using flexible duct, pull it taut; slack in the duct creates turbulence and noise.
“My old fan has no ground wire.”
Older homes may not have a ground wire in the bathroom lighting circuit. While modern fans function without it, grounding is a critical safety feature for moisture-heavy environments. Consult a licensed electrician if your wiring does not include a ground.
Replacing an exhaust fan is a manageable DIY project if you assess the “hardness” factors—access, sizing, and ductwork—before starting. With the right preparation, you can drastically improve your home’s air quality and banish foggy mirrors for good.
Frequently Asked Questions
How do I determine the right fan size for my bathroom?
The industry standard is to have 1 CFM (Cubic Feet per Minute) for every square foot of your bathroom. For example, if your bathroom is 80 square feet, you should install a fan rated for at least 80 CFM. If you frequently experience heavy steam or foggy mirrors, upgrading to a slightly higher CFM is recommended.
Can I replace a bathroom fan without access to the attic?
Yes, this is known as a “room-side” installation. While it is more difficult than working from an attic, you can remove the old housing and install the new one from below. Many modern replacement fans include special retrofit brackets or “old work” clips designed specifically for this scenario.
Is it possible to replace just the motor instead of the entire housing?
If your existing metal housing is in good shape and you can find a compatible motor/blower assembly, a motor swap is the easiest way to fix a failing fan. This typically involves unplugging the old motor and snapping a new one into the existing plate, requiring no drywall work or duct reconnections.
What should I do if my new fan has a 4-inch outlet but my old duct is only 3 inches?
While you can use a duct reducer to connect a 4-inch fan to a 3-inch duct, this can increase noise and reduce the fan’s efficiency. For optimal performance and moisture control, it is best practice to replace the ducting with a size that matches the new fan’s specifications.
How can I tell if my newly installed fan is actually pulling air?
A simple way to test the suction is the “toilet paper test.” While the fan is running, hold a single square of toilet paper up to the intake grille. If the installation is successful and the ductwork is clear, the suction should be strong enough to hold the paper in place against the fan.