Ultimate Guide: Deep Cleaning Your Bathroom Ventilation System
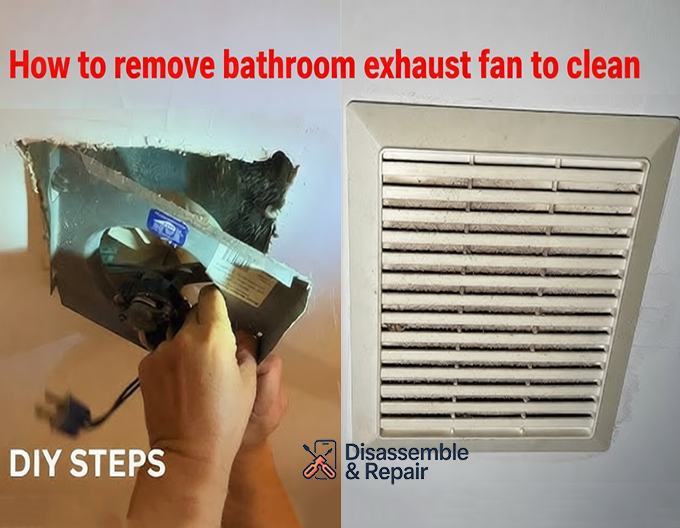
Learning how to remove bathroom exhaust fan to clean is a critical skill for maintaining a healthy, mold-free home environment. A neglected fan cannot effectively pull moisture from the air, leading to peeling wallpaper, warped doors, and the proliferation of harmful mildew.
If your fan has become noisy or the mirror stays foggy long after your shower, it is time to tackle this task. This comprehensive guide will walk you through the process of disassembling, cleaning, and reassembling your unit with the precision of a professional.
Why Deep Cleaning Is Non-Negotiable
Over time, dust accumulation significantly hinders your fan’s performance. It creates a thick layer on the impeller blades and the interior of the housing unit, adding weight and friction that strains the fan motor. This not only shortens the lifespan of the appliance but can also pose a fire risk if the motor overheats. Regular maintenance ensures efficient airflow and quieter operation.
Tools and Safety Preparations
Before you climb the ladder, gathering the right tools is essential for a smooth workflow. You will need:
- Screwdriver (Phillips and flathead)
- Vacuum cleaner attachment (brush and crevice tools)
- Mild detergent and warm soapy water
- Microfiber cloths
- Safety goggles and a dust mask
- A sturdy step ladder
Safety First: The most critical step is electrical safety. You must locate your home’s main electrical panel and switch off the circuit breaker that controls the bathroom. Do not rely solely on the wall switch, as accidental bumps can turn the power back on while you are working with exposed wiring. Always test the fan to ensure the power is completely cut before proceeding.
Step-by-Step Guide on How to remove bathroom exhaust fan to clean
This section serves as your core instruction manual. Follow these steps carefully to dismantle the unit without damaging the delicate components.
1. Removing the Vent Cover
The vent cover (or grille) is the visible plastic piece on your ceiling.
- Standard Fans: Gently pull the cover downward a few inches. You will likely see two metal mounting springs on either side. Squeeze these springs together with your fingers to release them from the slots in the housing.
- Screw-Mounted Covers: Some older models or combined light/fan units are secured with a screw in the center. Use your screwdriver to remove this carefully, supporting the cover with your other hand so it doesn’t fall.
- Light Kits: If your unit has a light, you will need to unplug the small light plug connecting the cover to the housing before setting the cover aside.
Cleaning Tip: Once removed, submerge the plastic vent cover in a basin of warm soapy water. Let it soak while you work on the rest of the fan to loosen stubborn grime.
2. Disconnecting the Fan Assembly
With the cover off, you now have clear access to the housing unit. You will see the fan motor bracket and the electrical connector.
- Unplug the Motor: Locate the small black or white electrical plug that connects the motor to the housing’s receptacle. Pull it straight out to disconnect the power.
- Remove the Motor Assembly: This step varies slightly by model. Look for a screw or a metal tab holding the motor plate in place.
- Tab Lock: If you see a metal tab, insert a flathead screwdriver into the slot and twist gently to release the plate.
- Screw Mount: If screws are present, remove them.
- Extract the Unit: Wiggle the motor plate gently. It should pivot down or slide out. Be careful not to drop it, as the motor is heavy.
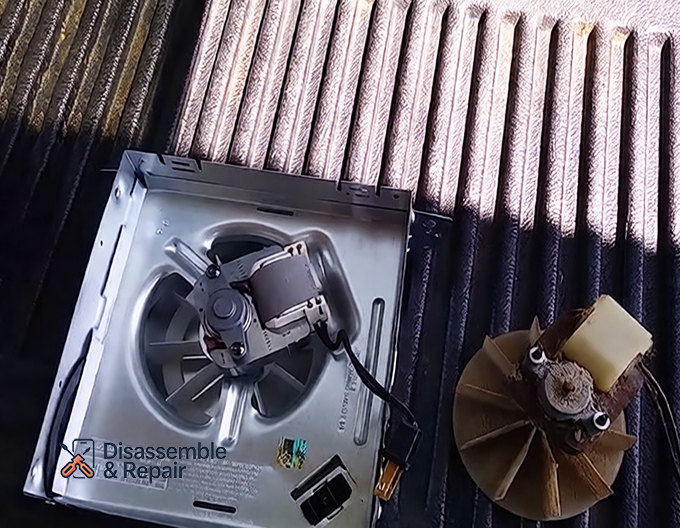
3. Detailed Cleaning of the Motor and Blades
Now that you have the motor assembly on a secure surface, you can perform a deep clean.
- Impeller Blades: The fan blades (often a squirrel-cage design known as an impeller) trap a significant amount of lint. Use a vacuum with a brush attachment to remove loose debris. For stuck-on dust, use a damp cloth or an old toothbrush. Crucial: Do not submerge the motor or blades in water. Water infiltration can destroy the fan motor bearings and electrical components.
- Motor Housing: Use compressed air or your vacuum to suck dust out of the motor windings. Keeping the motor clean allows it to dissipate heat effectively.
4. Cleaning the Housing and Ductwork
Return to the bathroom and look up into the empty housing unit still in the ceiling.
- Vacuum the Interior: The metal box will likely be coated in gray fuzz. Use your vacuum cleaner attachment to remove every trace of dust.
- Check the Ventilation Ducting: Shine a flashlight into the ventilation ducting port. If you see a blockage near the opening, vacuum it out gently. A clear path is vital for the moist air to escape your home. If the duct appears heavily clogged further up, you may need a professional duct cleaning service.
5. Reassembling Your Exhaust Fan
Once all parts are dry and clean, reverse the process.
- Reinstall the Motor: Slide the motor plate back into the housing. Secure it with the screws or snap the tab back into place. Ensure the fit is tight to prevent rattling noises.
- Reconnect Power: Plug the electrical connector back into the receptacle inside the housing.
- Attach the Cover: Dry the vent cover completely. Squeeze the mounting springs and insert them back into the housing slots. Push the cover up until it sits flush against the ceiling.
- Final Check: Turn the circuit breaker back on and flip the wall switch. Listen for a smooth, quiet hum and verify that the air is being suctioned (you can test this by holding a square of toilet paper up to the vent; it should stick).
Troubleshooting Common Issues
Sometimes, even after learning how to remove bathroom exhaust fan to clean and executing the steps, you may encounter issues.
- Fan Won’t Turn On: Check the electrical connector. It may not be seated fully. If that fails, the motor itself may have burned out and needs replacement.
- Still Noisy: If cleaning didn’t solve the noise, the bearings in the motor might be worn. In this case, buying a replacement motor kit is often easier and cheaper than replacing the entire ceiling unit.
- Poor Airflow: If the fan is running but not moving air, check the ventilation ducting again. The flapper valve (damper) at the exit point of your house might be stuck shut.
Conclusion
Regular maintenance of your bathroom exhaust fan is a small investment of time that pays off in cleaner air and a mold-free home. By mastering the process of how to remove bathroom exhaust fan to clean, you extend the life of your equipment and ensure your bathroom remains a sanitary sanctuary. Aim to perform this deep clean at least twice a year to keep dust accumulation at bay and your system running at peak efficiency.
Frequently Asked Questions
How often should I perform a deep clean on my bathroom exhaust fan?
To maintain a healthy environment and keep the system running at peak efficiency, you should aim to perform a deep clean at least twice a year. Regular maintenance prevents heavy dust accumulation that can lead to motor strain or fire risks.
Can I wash the fan motor and blades with soapy water?
No. You should never submerge the motor or the impeller blades in water, as moisture can destroy the motor bearings and electrical components. Instead, use a vacuum with a brush attachment for loose debris and a damp cloth or old toothbrush for stuck-on dust. Only the plastic vent cover should be soaked in soapy water.
What should I do if the fan is still noisy after I have cleaned it?
If cleaning the dust off the blades and housing does not stop the noise, the bearings inside the motor are likely worn out. In this situation, it is usually more cost-effective to buy a replacement motor kit rather than replacing the entire ceiling unit.
How can I verify that my fan is actually removing air from the room?
A simple way to check for proper airflow is the “toilet paper test.” Turn the fan on and hold a single square of toilet paper up to the vent cover. If the fan is functioning correctly, the suction should be strong enough to hold the paper against the grille.
Why is it necessary to turn off the circuit breaker instead of just the wall switch?
Safety is the top priority when working with electrical components. Relying solely on a wall switch is dangerous because someone could accidentally flip the switch while you are handling exposed wiring. Turning off the power at the main circuit breaker ensures the unit is completely de-energized.


