Knowing how to remove Nutone bathroom fan housing is a critical skill for homeowners looking to upgrade their ventilation or replace a noisy, outdated unit. Whether you are dealing with a burnt-out motor or simply renovating your bathroom, removing the entire metal enclosure requires a systematic approach to avoid damaging your ceiling drywall.
Project Overview
Bathroom exhaust fans are essential for preventing mold and mildew, but removing them can be deceptive. While the visible grille cover and motor assembly often come out easily, the housing itself—the metal box recessed into the ceiling—is frequently attached to ceiling joists with mounting brackets that may be hidden behind drywall installation.
Before you begin, it is vital to determine if you actually need to remove the housing. In many cases, you can simply install a replacement motor and blower wheel into the existing box. However, if the housing is rusted, damaged, or you are upgrading to a larger, quieter model, full removal is necessary.
Safety Precautions
Working with electricity and overhead fixtures carries inherent risks.
- Turn off the power: Locate your home’s breaker panel and switch off the circuit that controls the bathroom fan. Never rely solely on the wall switch.
- Test for voltage: Use a non-contact voltage tester to confirm there is no power flowing to the unit before touching any wires.
- Eye and Lung Protection: Expect dust, insulation, and debris to fall when you pull the housing. Wear safety goggles and a dust mask.
Tools and Materials Needed
- Screwdrivers: Both flathead and Phillips head.
- Voltage Tester: To ensure electrical safety.
- Pry Bar: For leveraging the housing away from joists.
- Utility Knife: To cut away caulk or paint seals.
- Reciprocating Saw or Oscillating Multi-Tool: Essential for cutting mounting bars if you do not have attic access.
- Pliers: For handling wire nuts and stiff metal tabs.
- Flashlight or Headlamp: To see inside the dark ceiling cavity.
How to remove Nutone bathroom fan housing
This section details the core process. Note that Nutone fans generally come in two installation styles: “New Construction” (installed before drywall) and “Old Work” (installed after drywall). The removal process differs slightly for each.
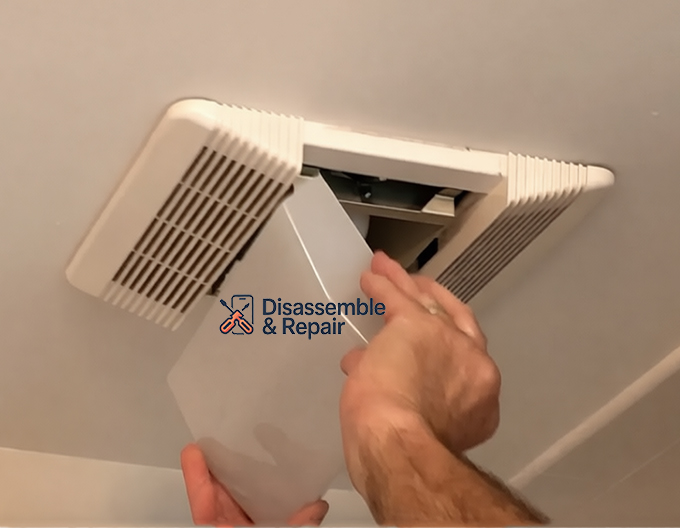
Step 1: Remove the Grille Cover
The grille cover is the plastic vent face visible from the bathroom.
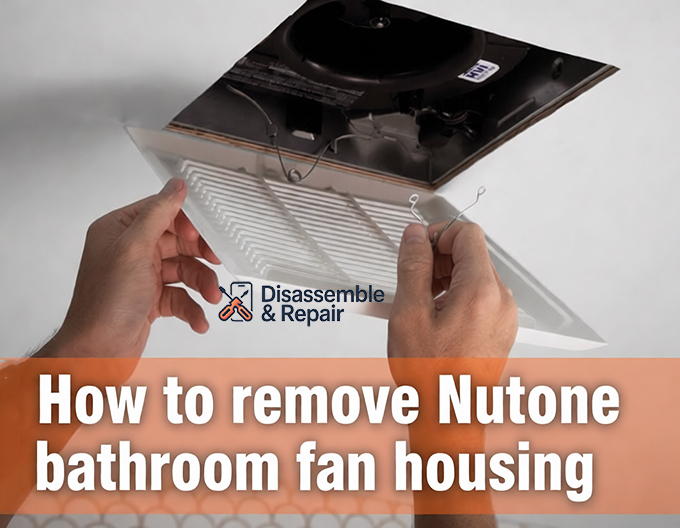
- Gently pull the cover downward about an inch to reveal the mounting springs.
- Squeeze the metal V-shaped springs together to release them from the slots in the housing.
- If your model uses a center nut or screw instead of springs, unscrew it to release the cover.
Step 2: Remove the Motor Assembly
To access the housing mounting points, you must first clear the interior.
- Unplug the motor: Inside the housing, you will see a small electrical plug (usually black or white) inserted into a receptacle built into the corner of the box. Unplug it.
- Release the motor plate: Look for a metal tab or a screw securing the motor assembly plate to the housing.
- Tab style: Insert a flathead screwdriver into the slot next to the tab and twist gently to unlock it.
- Screw style: Remove the single screw holding the plate.
- Slide and remove: Wiggle the plate until the tabs disengage, then lower the motor and blower wheel out of the housing.
Step 3: Disconnect the Wiring
Now you will disconnect the fan from your home’s power supply.
- Locate the electrical junction box inside the fan housing. This is usually a small metal compartment in the corner.
- Remove the screw holding the junction box cover and set it aside.
- Pull the wires gently out of the box. You will typically see a black (hot), white (neutral), and green or bare (ground) wire connected with wire nuts.
- Unscrew the wire nuts to separate the fan wires from the house wires.
- Loosen the cable clamp (Romex connector) that secures the house wire entering the box, and push the house wire back out of the housing so it is free.
Step 4: Detach the Vent Ducting
The vent ducting carries moist air outside. It is attached to the fan’s outlet pipe.
- From the attic: If you have access, go into the attic and disconnect the duct tape or clamp holding the duct to the fan.
- From below: If you have no attic access, you may need to push the housing up slightly or pull it down to access the duct connection. You might have to cut the old foil tape with a utility knife to free the duct.
Step 5: Remove the Housing
This is the most challenging step. The method depends on how the fan was mounted to the ceiling joists.
Method A: Removing “Old Work” Fans (Tabs or Ears)
If the fan was installed after the drywall was up, it likely uses bendable metal tabs or screws through the side of the housing directly into a joist.
- Look for screws driven through the side of the metal box into the wood joist. Remove them.
- If there are no screws, look for metal “ears” or tabs that are bent outward against the drywall. Straighten these with pliers.
- Pry the housing loose and pull it down through the hole.
Method B: Removing “New Construction” Fans (Hanger Bars)
These fans were mounted to mounting brackets (hanger bars) that span between joists before the drywall was installed. The housing is often flanged, meaning it sits on top of the drywall, making it impossible to pull straight down without damage.
- Identify the flange: Run your finger along the edge of the housing. If you feel a metal lip sitting on top of the drywall, you cannot pull it down.
- The “Crush and Cut” Technique:
- Since you are discarding the old housing, you do not need to keep it pristine.
- Use a pair of pliers to bend the metal sides of the housing inward, away from the joists.
- If the unit is attached to hanger bars, use a reciprocating saw or oscillating tool with a metal-cutting blade to cut the mounting bars as close to the housing as possible.
- Twist and Pull: Once the bars are cut or the housing is bent away from the joist, twist the housing to disengage it from the remaining brackets and pull it down through the ceiling opening.
Handling Unexpected Complications
Even with a plan, you might encounter issues. Here is how to handle them.
Dealing with Stuck Vent Ducts
Sometimes installers use excessive amounts of tape or screws to secure the vent ducting, making it hard to remove from below.
- Solution: If you cannot reach the connection, you may need to cut the metal outlet pipe of the fan housing itself using tin snips. This allows you to remove the box while leaving the duct attached to a small piece of metal, which you can then carefully peel away from the ducting once you have more room to work.
Managing Drywall Damage
During drywall installation, installers often cut the hole too large or too small.
- Too Tight: If the housing is stuck on the drywall edge, run a utility knife around the perimeter to slice through any paint or caulk acting as glue.
- Damage: If you accidentally crumble the edge of the drywall, don’t panic. Most new exhaust fan housing units come with a slightly larger bezel or you can buy a dedicated trim ring to hide jagged edges.
Rigid Ductwork vs. Flexible Ducting
If your home uses rigid metal piping instead of flexible hose, you have less “wiggle room.” You may need to unscrew the mounting bracket inside the housing that holds the damper flap to gain a few extra inches of clearance to slide the duct off.
Installation Prep for the New Fan
Once the old Nutone housing is removed, you are left with a hole in the ceiling, a hanging electrical wire, and a vent duct. Before installing the new unit, take these steps:
- Inspect the Wood: Check the ceiling joists for signs of water damage or black mold. A leaking fan duct can cause rot over time.
- Check the Wiring: Ensure the copper wires are not nicked or brittle. Strip back fresh insulation if necessary.
- Resize the Hole: Your new fan might require a larger opening. Use the template provided with your new fan to mark the ceiling, and cut the drywall carefully with a keyhole saw.
Conclusion
Learning how to remove Nutone bathroom fan housing correctly can save you the cost of hiring a contractor and ensure your bathroom renovation proceeds smoothly. By methodically disassembling the grille cover, motor assembly, and electrical junction box before attacking the main housing, you minimize the risk of damaging your ceiling or wiring. Whether you cut the mounting bars or simply unscrew the unit from the joist, patience is your best tool. With the old unit out, you are now ready to install a modern, efficient fan that will keep your bathroom fresh and moisture-free for years to come.
Frequently Asked Questions
Can I replace a Nutone fan without removing the entire housing?
Yes. If the metal housing is still in good condition and not rusted, you can often replace just the motor and blower wheel assembly. Nutone offers specific replacement kits that allow you to “plug and play” a new motor into the old box, which saves you the trouble of cutting drywall or disconnecting ductwork.
How do I know if my fan is a “New Construction” or “Old Work” model?
If you see screws driven through the side of the housing directly into a wooden joist, it is likely an “Old Work” installation. If the housing has a metal lip (flange) resting on top of the drywall or is held up by metal bars spanning between joists that you cannot see from below, it is a “New Construction” model.
What is the best way to remove a housing if I don’t have attic access?
If you cannot reach the unit from above, you must use the “crush and cut” method. This involves using pliers to bend the sides of the metal housing inward to create space, and then using an oscillating multi-tool or reciprocating saw to cut the mounting brackets or hanger bars from below.
What should I do if the hole in my ceiling is too large for the new fan?
If the previous removal caused drywall damage or the new unit is smaller, you can use a “goof ring” or “ceiling medallion.” These are plastic or metal trim pieces designed to hide gaps between the fan housing and the drywall. Alternatively, you may need to patch the drywall with a small piece of sheetrock and joint compound before installing the new unit.
Do I need to replace the vent ducting when I remove the housing?
Not necessarily. If the existing flexible or rigid ducting is in good shape and free of lint buildup, you can reuse it. However, if the duct is cracked, brittle, or made of outdated materials like uninsulated plastic flex-hose, it is best to replace it with insulated ducting to prevent condensation and improve airflow.