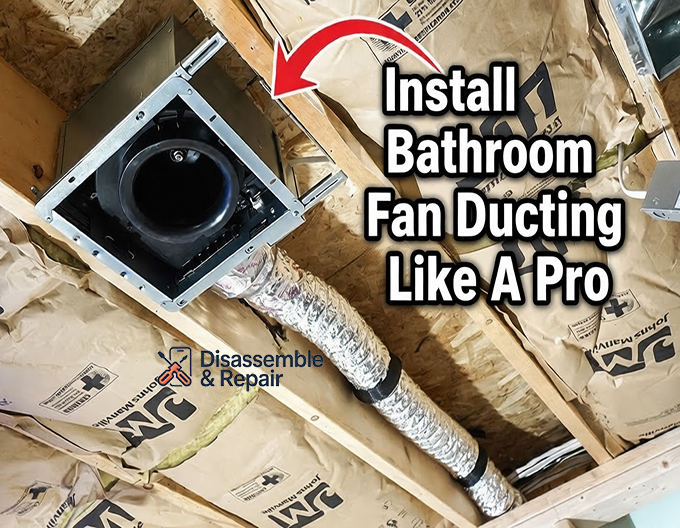
The bathroom, a sanctuary of steamy showers and relaxing baths, can quickly become a breeding ground for moisture-related problems if not properly ventilated. Excess humidity leads to foggy mirrors, peeling paint, warped wood, and, most concerningly, the growth of mold and mildew. A robust bathroom ventilation, How to install duct for bathroom exhaust fan, ducting, pro installation system is not just about removing odors; it’s about safeguarding your home’s structural integrity and the health of its occupants. This comprehensive guide will walk you through every step, ensuring you can install bathroom fan ducting like a seasoned professional, transforming your bathroom into a fresh, inviting, and healthy space.
Key Takeaways
- Crucial for Health & Home: Proper bathroom ventilation prevents mold, mildew, structural damage, and improves indoor air quality.
- Plan is Paramount: Carefully consider fan sizing, duct material (rigid is often best), routing, and termination point before starting.
- Insulation is Key: Always insulate ductwork, especially in unconditioned spaces, to prevent condensation.
- Vent Outside, Always: Never vent a bathroom fan into an attic, crawlspace, or wall cavity.
- Seal it Tight: Use appropriate tape or mastic to create airtight connections for optimal performance.
- Professional Finish: Take your time, follow manufacturer instructions, and avoid common mistakes for a long-lasting, efficient system.
Why Proper Bathroom Ventilation Matters for Your Home
Many homeowners underestimate the power of effective bathroom ventilation. Without it, the warm, moist air from showers and baths has nowhere to escape, creating a humid microclimate. This lingering moisture is the primary culprit behind a cascade of household issues.
Beyond Odors: Protecting Against Moisture & Mold
While a good exhaust fan certainly tackles unpleasant odors, its most critical role is moisture control. Condensation on walls, ceilings, and fixtures creates an ideal environment for mold and mildew to thrive. These unwelcome guests not only look unsightly but can also cause paint to peel, wood to warp, and even lead to structural damage over time. By efficiently removing humid air and replacing it with drier air from adjacent spaces, your ventilation system prevents this destructive cycle.
Health Benefits & Air Quality
Beyond structural concerns, poor ventilation can impact your health. Mold spores can trigger allergies, respiratory issues, and other health problems. Moreover, bathrooms often contain cleaning products and personal care items that release airborne particles and chemicals. Proper bathroom ventilation ensures these pollutants are whisked away, contributing to healthier indoor air quality for your family.
Planning Your Ductwork: Essential Considerations
Before you even think about cutting, thorough planning is non-negotiable. This stage determines the efficiency and longevity of your bathroom fan system.
Choosing the Right Fan (CFM & Sones)
The fan’s capacity, measured in Cubic Feet per Minute (CFM), is crucial. A general rule of thumb for bathrooms 100 square feet or less is 1 CFM per square foot of room area. For larger bathrooms or those with multiple fixtures (e.g., separate shower, jetted tub), additional CFM is required. For instance, a jetted tub might need an extra 100 CFM. Don’t oversize too much, as it can pull in unfiltered outside air, but slightly oversizing is generally better than undersizing. Also, consider the “sone” rating, which measures noise level; lower sones mean quieter operation.
Ducting Material: Rigid vs. Flexible
The type of ducting material significantly impacts airflow and condensation.
- Rigid Ducting (Metal or Plastic): This is the preferred choice for optimal performance. Smooth interior walls allow air to travel freely, minimizing pressure loss and operating more quietly. Galvanized steel or PVC (especially in colder climates to reduce condensation) are common options.
- Flexible Ducting (Aluminum Foil or PVC): While easier and less expensive to install, flexible ducts have ribbed interiors that restrict airflow, reduce efficiency, and can sag, creating condensation traps. They are best reserved for short runs or connecting rigid sections. If used, ensure it’s stretched taut to minimize friction and sagging.
Duct Diameter: Matching Your Fan
Always use ducting that matches or is larger than the fan’s exhaust port. Most 50 CFM fans use 4-inch ducts, but higher CFM fans may require 5- or 6-inch diameters for optimal performance. An undersized duct will severely restrict airflow and reduce the fan’s effectiveness.
Routing the Duct: Short, Straight, and Sloped
The ideal duct run is as short and straight as possible, with minimal bends. Every bend, especially sharp 90-degree elbows, significantly reduces airflow efficiency. If bends are unavoidable, opt for gradual turns. The ductwork should also be slightly pitched downward toward the exterior termination point. This slope helps any potential condensation drain outside instead of back into the fan or bathroom. Aim for at least two feet of straight duct run from the fan exhaust port before the first elbow.
Venting to the Exterior: Roof, Wall, or Soffit
It is an absolute STRICT REQUIREMENT that bathroom exhaust fans always vent directly to the outdoors. Never terminate ducting into an attic, crawlspace, wall cavity, or another conditioned space. Doing so will simply transfer the moisture problem elsewhere, leading to mold, mildew, and potential structural damage in those areas.
Common exterior termination points include:
- Roof: Often considered the best option, especially for centrally located bathrooms, as warm, moist air naturally rises. Requires a specific roof vent cap.
- Gable Wall: A good alternative if a roof vent is impractical.
- Soffit: The least preferred option due to the risk of moist air being drawn back into the attic through soffit vents. If using a soffit vent, ensure it’s specifically designed for exhaust and that the exhaust points away from any intake vents.
Insulation: A Critical Step
Insulating your ductwork is critical, especially when the duct runs through unconditioned spaces like attics, crawlspaces, or cold climates. Warm, humid air from the bathroom passing through a cold duct will condense, forming water droplets that can pool in the duct, drip back down, or lead to mold growth within the ducting itself. Pre-insulated flexible ducting or insulation sleeves for rigid ducts are readily available.
Tools and Materials You’ll Need
Having the right tools and materials on hand will make the installation process smoother and safer.
Safety Gear
- Safety glasses
- Work gloves
- Dust mask/respirator
- Sturdy ladder
Cutting & Drilling Tools
- Drywall saw or reciprocating saw (for ceiling/wall openings)
- Hole saw (for exterior vent cap)
- Cordless drill with various bits (pilot holes, spade bit)
- Utility knife
Measuring & Marking Tools
- Tape measure
- Pencil or marker
- Stud finder (essential for locating joists/rafters)
Ducting & Fasteners
- Appropriate ducting (rigid metal/PVC or insulated flexible)
- Duct connectors, elbows (if necessary)
- Duct straps or hangers (to support ductwork)
- Screws (for mounting fan and vent cap)
Sealing & Finishing
- UL-approved foil duct tape or mastic sealant (for airtight connections)
- Exterior-grade silicone caulk (for sealing exterior vent cap)
- Vent cap (roof or wall type, with backdraft damper)
Step-by-Step Guide: Installing Bathroom Fan Ducting Like a Pro
This guide focuses on the ducting aspect of installation. For detailed fan installation, always refer to the manufacturer’s instructions.
Step 1: Plan Your Fan and Duct Location
Identify the best location for your fan – typically above or very near the shower or tub, which are the primary sources of moisture. Once the fan location is set, determine the most direct route for your ductwork to the chosen exterior termination point (roof or wall). Use a stud finder to locate joists and rafters to avoid them if possible, or plan to cut and frame around them.
Step 2: Prepare the Opening for the Fan
From the bathroom side, drill a small pilot hole through the ceiling at the approximate center of where your fan will be located. Go into the attic (or crawlspace above) and locate this hole. Clear any insulation. Using the fan housing as a template, mark the precise cutout dimensions on the ceiling. Double-check for any hidden wiring or plumbing. Carefully cut the opening using a drywall saw or reciprocating saw.
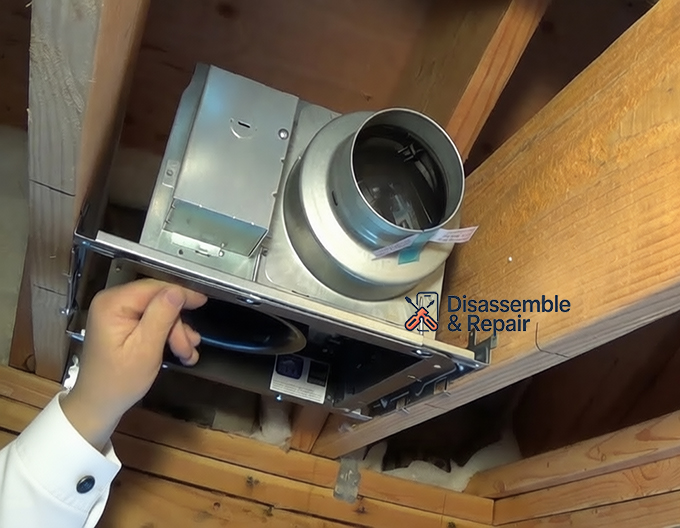
Step 3: Mount the Exhaust Fan Housing
If you’re replacing an old fan, remove it. For new installations, extend the mounting brackets of the new fan housing to span across two joists. Secure the fan housing to the joists with screws. Ensure the fan’s exhaust port is oriented towards your planned duct run to minimize bends.
Step 4: Connect the Ductwork to the Fan
Attach the appropriate ducting material to the fan’s exhaust port. If your fan has a backdraft damper, ensure it’s not obstructed. Secure the ducting to the fan collar using a clamp and/or UL-approved foil tape or mastic sealant, creating an airtight connection. This is a critical step in how to install duct for bathroom exhaust fan, ducting, pro installation.
Step 5: Route and Secure the Ducting
Carefully route the ductwork along your planned path to the exterior. Keep the run as short and straight as possible, minimizing bends. If using flexible duct, stretch it tight to prevent sagging and airflow restriction. Use duct straps or hangers to support the ductwork every few feet to maintain its shape and pitch. Remember to maintain a slight downward slope towards the exterior.
Step 6: Install the Exterior Vent Cap
From the attic (or inside), drill a pilot hole through your chosen exterior wall or roof sheathing at the termination point. Go outside and locate the pilot hole. Using a hole saw or reciprocating saw, cut the appropriate-sized opening for your vent cap. Apply a bead of exterior-grade silicone caulk around the perimeter of the opening. Insert the vent cap and secure it with screws, ensuring a watertight seal. For roof installations, you may need to lift or replace shingles and apply roofing cement for proper flashing.
Step 7: Seal All Connections and Penetrations
Return to the attic or crawlspace. Thoroughly seal all duct connections and seams with UL-approved foil tape or mastic sealant. Also, seal any gaps around the fan housing where it meets the drywall with caulk to prevent air leakage between the conditioned bathroom space and the unconditioned attic.
Step 8: Insulate the Ductwork
Once all connections are sealed, insulate the entire length of the ducting that passes through unconditioned spaces. This is essential to prevent condensation. Use insulated flexible ducting or wrap rigid ductwork with appropriate insulation sleeves.
Step 9: Complete Electrical Wiring & Install Fan Grille
Connect the electrical wiring according to the manufacturer’s instructions and local codes. If you’re unsure, consult or hire a licensed electrician. Once wiring is complete and verified, install the fan grille on the bathroom ceiling. Finally, restore power and test your new bathroom ventilation, How to install duct for bathroom exhaust fan, ducting, pro installation system!
Common Mistakes to Avoid During Installation
Even experienced DIYers can make common errors that compromise system performance.
- Venting into the Attic or Crawlspace: As stressed, this is a critical mistake that leads to severe moisture problems and mold growth in hidden areas.
- Using Undersized or Wrong Duct Material: Flexible ducting, while convenient, can significantly impede airflow, especially on longer runs. Using ducting too small for the fan’s exhaust port also chokes the system.
- Excessive Bends and Long Runs: Each bend and extended length of ductwork reduces fan efficiency. Keep runs as direct as possible.
- Unsealed Duct Connections: Leaky duct connections allow humid air to escape into unconditioned spaces and reduce the fan’s overall effectiveness. Always tape or mastic seal all joints.
- Forgetting Insulation: Skipping duct insulation, particularly in cold climates or unconditioned attics, invites condensation, drips, and mold within the duct itself.
Maintaining Your Bathroom Ventilation System
Once installed, a little maintenance goes a long way in keeping your system running efficiently.
- Regular Cleaning: Periodically remove the fan grille and clean dust and debris from the fan blades and housing.
- Checking for Obstructions: Inspect the exterior vent cap to ensure it’s free of bird nests, insect screens, or other blockages that could impede airflow.
Conclusion
Installing bathroom fan ducting like a pro is a rewarding project that directly contributes to a healthier, more durable home. By understanding the critical role of bathroom ventilation,How to install duct for bathroom exhaust fan, ducting, pro installation, carefully planning your ductwork, choosing the right materials, and meticulously following each step, you can create an efficient system that will protect your bathroom from moisture damage for years to come. Breathe easy knowing your home is well-ventilated and protected. Need further guidance? Check out this resource on How to install duct for bathroom exhaust fan for more detailed visual instructions.
FAQ
Why is proper bathroom ventilation crucial for my home and health?
Proper bathroom ventilation is essential because it prevents the buildup of excess humidity, which can lead to foggy mirrors, peeling paint, warped wood, and the growth of mold and mildew. Beyond odors, it safeguards your home’s structural integrity, improves indoor air quality, and protects the health of its occupants by reducing moisture-related problems.
Where should a bathroom exhaust fan always be vented?
A bathroom exhaust fan should always be vented directly to the outside of your home. It is crucial to never vent it into an attic, crawlspace, or wall cavity, as this can trap moisture in unconditioned spaces, leading to condensation, mold growth, and potential structural damage.
What are key considerations before starting a bathroom fan ducting installation?
Planning is paramount before starting the installation. Key considerations include carefully determining the appropriate fan sizing for your bathroom’s volume, selecting the right duct material (rigid ducting is often recommended), planning the most efficient routing of the ductwork, and identifying the optimal termination point outside your home.
Why is it important to insulate bathroom fan ductwork?
Insulating the ductwork is key, especially when it runs through unconditioned spaces like an attic or crawlspace. This insulation helps prevent condensation from forming inside the duct, which occurs when warm, moist air from the bathroom meets colder surfaces in the ducting. Condensation can lead to water pooling, dripping, and potential mold growth within the duct system.


