Proper ventilation is the unsung hero of a healthy home, preventing mold growth and maintaining air quality. If you are planning to install NuTone bathroom fan units during your next renovation, you are making a choice that combines reliability with high-performance moisture control. Whether you are tackling a full bathroom remodeling project or simply replacing an old, noisy unit, this guide will walk you through the process with the precision of a seasoned HVAC professional.
Understanding Your Needs: CFM and Sones
Before you pick up a screwdriver, you must select the right Broan-NuTone model for your space. Two critical specifications define performance: CFM (Cubic Feet per Minute) and Sones.
Calculating CFM
CFM measures the volume of air the fan motor moves. A fan that is too small won’t effectively remove moisture, leading to peeling wallpaper and moldy grout.
- Rule of Thumb: You need 1 CFM per square foot of bathroom area.
- Example: A 70 sq. ft. bathroom requires at least a 70 CFM fan.
- Fixture Add-ons: If your bathroom is larger than 100 sq. ft., add 50 CFM for each toilet, shower, and bathtub, and 100 CFM for a jetted tub.
Understanding Sones
Sones measure sound output.
- 4.0 Sones: Comparable to normal television volume (standard builder-grade fans).
- 1.0 Sone or less: Ultra-quiet, barely audible (recommended for master baths).
Tools and Materials Required
To successfully install NuTone bathroom fan hardware, gather these items beforehand:
Tools:
- Drywall saw or jigsaw
- Power drill with Phillips bit
- Voltage tester (non-contact)
- Wire strippers and pliers
- HVAC foil tape (do not use standard duct tape)
- Stud finder
Materials:
- NuTone fan unit (housing, blower, grille)
- 4-inch flexible or rigid ventilation duct
- Exterior vent cap (roof or wall)
- Wire nuts (UL approved)
- Electrical cable (Romex, typically 14/2 or 12/2)
Safety First: Electrical and Structural Precautions
Working with electrical wiring and cutting into ceilings requires caution.
- Power Off: Always turn off the circuit breaker at the main panel. Use a voltage tester to confirm the power is dead before touching any wires.
- Attic Safety: If you are working from above, step only on joists, never on the drywall or attic insulation.
- Protective Gear: Wear a dust mask and safety goggles, especially when cutting drywall or handling fiberglass insulation.
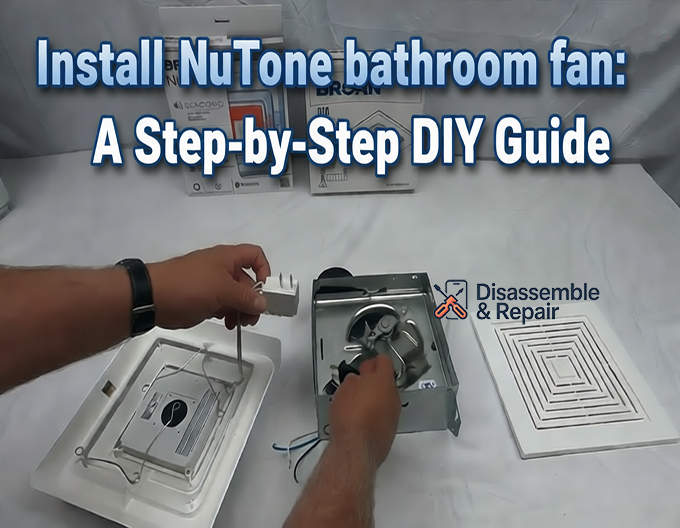
Step-by-Step Guide: Install NuTone Bathroom Fan
This section covers a standard retrofit installation (replacing an existing fan) or a new installation where attic insulation access is possible.
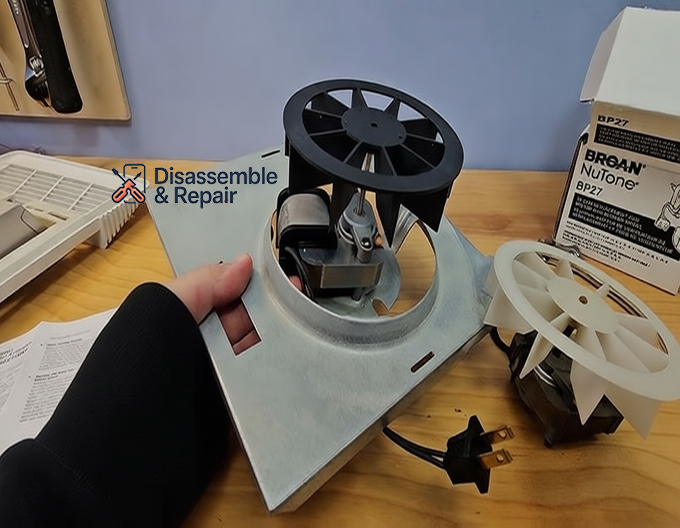
Step 1: Remove the Old Unit
If you are replacing a fan, remove the grille by pulling it down and squeezing the mounting springs. Unplug the fan motor from the receptacle inside the housing. Disconnect the wiring and remove the screws fastening the housing to the joist. You may need to head into the attic to disconnect the ductwork and fully remove the old housing.
Step 2: Prepare the Ceiling Opening
For a new installation, use the template provided in the NuTone box. Trace the outline onto the ceiling.
- Pro Tip: Position the housing next to a ceiling joist for secure mounting.
- Cut the drywall carefully using a drywall saw. Ensure you do not cut into existing pipes or wires hidden behind the plaster.
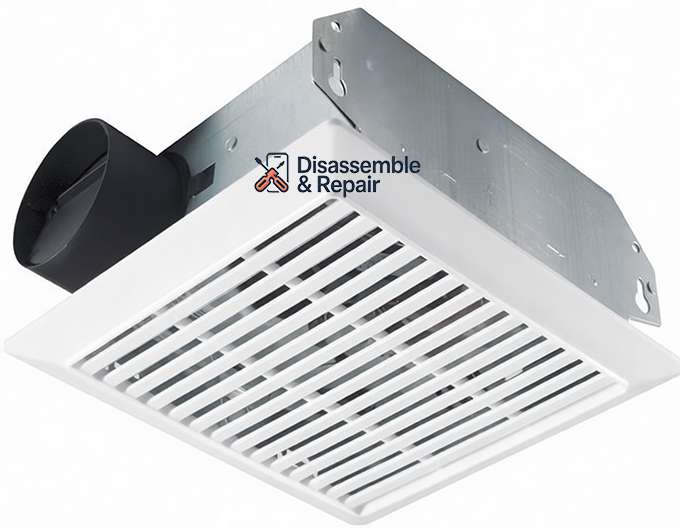
Step 3: Mount the Fan Housing
Newer Broan-NuTone models, like the InVent™ series, often feature “room-side” installation, eliminating the need to crawl into the attic.
- Insert Housing: Slide the metal housing into the ceiling opening.
- Secure to Joist: Screw the housing flanges directly into the wood joist. If your model uses hanger bars, extend them to reach joists on both sides and screw them in place.
- Leveling: Ensure the bottom edge of the housing is flush with the ceiling drywall. This ensures the grille will sit flat later.
Step 4: Connect the Ventilation Duct
Proper ductwork is vital for moisture control.
- Attach the Damper: Install the damper / duct connector onto the fan housing. The damper flap prevents outside air from backdrafting into your bathroom.
- Connect Ducting: Slide your 4-inch ventilation duct over the connector.
- Seal: Secure the connection with a clamp and seal it thoroughly with HVAC foil tape.
- Warning: Do not use screws that might penetrate the damper flap and block it from opening.
- Venting: Run the duct to an exterior wall or roof cap. Never vent moist air directly into the attic, as this ruins attic insulation and causes roof rot.
Step 5: Electrical Wiring Connections
- Open the fan’s junction box.
- Pull the house wires through the cable clamp.
- Connect:
- Black to Black (Hot)
- White to White (Neutral)
- Green/Bare to Green (Ground)
- Secure connections with wire nuts and tuck them back into the junction box. Replace the metal cover.
Step 6: Install the Blower and Grille
- Insert Motor: If the fan motor was removed during housing installation, slide it back into place. Secure it with the provided screws or tabs.
- Plug In: Plug the motor cord into the internal electrical receptacle.
- Attach Grille: Squeeze the mounting springs on the grille and insert them into the slots on the housing. Push the grille up until it fits snugly against the ceiling.
Optimizing for HVAC Performance
Installing the fan is only half the battle. To ensure your HVAC system remains balanced and efficient:
- Duct Runs: Keep your ductwork as straight and short as possible. Every elbow or bend increases static pressure, reducing the fan’s effective CFM and increasing noise.
- Insulation: If the duct runs through an unconditioned attic, use insulated ducting. This prevents the warm, moist bathroom air from condensing inside the cold duct and dripping back down into the fan motor.
- Makeup Air: In extremely airtight modern homes, a powerful exhaust fan may require a source of makeup air to function correctly without depressurizing the house.
Troubleshooting Common Issues
Even after you install NuTone bathroom fan systems, minor issues can arise. Here is how to fix them:
- Rattling Noise: often caused by a loose screw on the motor mount or a grille that isn’t tight against the ceiling. Check all fasteners.
- High Sones / Loud Hum: This can occur if the ductwork is restricted or too small (e.g., using 3-inch pipe for a 4-inch fan). Ensure the duct is clear and sized correctly.
- Cold Drafts: If you feel cold air entering when the fan is off, the damper may be stuck open or missing. Check the transition point where the duct meets the housing.
Conclusion
A successful project to install NuTone bathroom fan equipment does more than just clear the fog from your mirror; it protects your home’s structural integrity. By carefully selecting the right CFM and Sones rating, ensuring airtight ventilation duct connections, and following safety protocols with electrical wiring, you ensure years of quiet, efficient operation. Whether for a bathroom remodeling upgrade or a quick repair, a properly installed NuTone fan is a small investment that delivers significant long-term value.
FAQ
How do I determine the right fan size (CFM) for my bathroom?
The general rule of thumb is to have 1 CFM (Cubic Feet per Minute) for every square foot of bathroom space. For example, a 70 sq. ft. bathroom requires a 70 CFM fan. If your bathroom is larger than 100 sq. ft., you should add an additional 50 CFM for each toilet, shower, or bathtub present in the room.
Can I vent my NuTone bathroom fan into the attic?
No. You must never vent moist air directly into the attic. This practice leads to moisture buildup, which can ruin attic insulation and cause structural roof rot. Always ensure the ventilation ducting leads all the way to an exterior wall or a roof vent cap.
What is the difference between a high and low Sone rating?
Sones measure the sound level produced by the fan motor. A rating of 4.0 Sones is roughly as loud as a normal television and is common in builder-grade fans. A rating of 1.0 Sone or less is considered ultra-quiet and is recommended for master suites where you want minimal noise.
Why is my newly installed fan making a loud rattling or humming noise?
A rattling noise is typically caused by a loose screw on the motor mount or a grille that hasn’t been pushed tight against the ceiling. A loud hum or excessive noise often indicates that the ductwork is restricted, either because it is too small (using 3-inch instead of 4-inch) or because there are too many bends in the duct run.
Do I need to go into the attic to install a NuTone fan?
Not necessarily. Many modern Broan-NuTone models, such as the InVent™ series, are designed for “room-side” installation. This allows you to mount the housing and connect the wiring directly through the ceiling hole without needing to access the attic, provided you can reach the existing ductwork.