Fans are the unsung heroes of our homes, tirelessly circulating air to keep us cool in summer and redistribute warmth in winter. Yet, despite their constant labor, they often go unnoticed – until a thick layer of dust, grime, and allergens becomes visibly apparent, diminishing their efficiency and potentially impacting your indoor air quality. A dirty fan doesn’t just look unsightly; it can work harder, make more noise, and even spread pollutants throughout your living space.
But fear not! Achieving a sparkling fan isn’t a monumental task reserved for cleaning professionals. With a little guidance, the right tools, and some elbow grease, you can easily remove accumulated debris and restore your fan to its optimal condition. This comprehensive guide will walk homeowners, DIY beginners, and busy individuals through the simple steps for easy fan removal and deep cleaning, ensuring your air stays fresh and your fan runs smoothly.
Key Takeaways
- Safety First: Always unplug the fan or turn off power at the breaker before any cleaning.
- Gather Your Gear: Microfiber cloths, screwdrivers, a vacuum with attachments, and mild cleaning solutions are essential.
- Disassembly is Key (for most fans): For a thorough clean, carefully remove grilles and blades following manufacturer instructions.
- Clean Components Separately: Wash removable parts in soapy water, wipe down fixed parts, and use compressed air for motors.
- Dry Thoroughly: Ensure all parts are completely dry before reassembly to prevent moisture damage and dust attraction.
- Regular Maintenance Prevents Buildup: Frequent light dusting extends the time between deep cleans.

Why Deep Clean Your Fan? Beyond Just Aesthetics
While a dusty fan is undeniably an eyesore, the reasons to deep clean go far beyond visual appeal. Regular and thorough cleaning contributes significantly to your home environment and the longevity of your appliance.
- Improved Air Quality: Fans accumulate dust, pet dander, pollen, and other allergens. When running, a dirty fan acts like a mini-pollutant disperser, blowing these particles back into your air and potentially exacerbating allergies or respiratory issues. A clean fan helps circulate truly clean air.
- Enhanced Efficiency and Performance: A thick layer of dust on blades and motor vents forces your fan to work harder to move air. This reduced efficiency means less effective cooling or air circulation, and it can also lead to increased energy consumption. Deep cleaning restores airflow and takes the strain off the motor.
- Extended Fan Lifespan: Overworked motors due to dust buildup can overheat and wear out prematurely. Keeping the motor and blades free from debris helps prevent damage and ensures your fan serves you for years to come.
- Reduced Noise: Accumulated dirt can unbalance fan blades, leading to wobbling and increased noise during operation. Cleaning can help restore balance and quiet operation.
Safety First: Essential Precautions Before You Start
Before you even touch your fan, safety must be your top priority. Working with electrical appliances requires diligence to prevent accidents.
- Disconnect Power: Always, always unplug your fan from the wall outlet. For ceiling fans or bathroom exhaust fans, turn off the power at the circuit breaker. This prevents accidental startup while your hands are inside the unit.
- Ensure Stability: If cleaning a ceiling fan or a high-mounted exhaust fan, use a sturdy step ladder or stool placed on a flat, dry surface. Avoid using chairs or unstable furniture.
- Protect Yourself: Wear a dust mask or face covering to avoid inhaling accumulated dust and allergens, especially if you have allergies or respiratory sensitivities. Safety glasses can protect your eyes from falling debris.
- Protect Your Space: Lay down old sheets, drop cloths, or towels on the floor and furniture directly beneath the fan to catch falling dust and debris.
Tools and Materials You’ll Need
Having the right equipment on hand will make the cleaning process smoother and more efficient.
- Microfiber cloths: Excellent for trapping dust and wiping surfaces without scratching.
- Screwdrivers (Phillips and Flathead): Many fans require these for disassembly.
- Vacuum cleaner with brush and crevice attachments: Ideal for removing loose dust from grilles, blades, and motor vents.
- Mild dish soap or all-purpose cleaner: Diluted with water for tackling grime and sticky residue.
- Spray bottle: For your cleaning solution (never spray directly onto electrical components).
- Old pillowcase: A clever trick for containing dust from ceiling fan blades.
- Soft-bristled brush or paintbrush: For loosening dust in tight spots.
- Compressed air (optional): Useful for blowing dust out of hard-to-reach motor vents, especially for fans that cannot be easily disassembled.
- Small container: To keep screws and small parts safe during disassembly.
- Warm water: For mixing with soap and rinsing.
Step-by-Step Guide to Easy Fan Removal & Deep Clean
While specific steps may vary slightly by fan type, the general principles of removal and deep cleaning remain consistent.
General Disassembly Tips
- Unplug and Prepare: Reiterate safety by ensuring the fan is unplugged or power is off at the breaker. Lay down your protective sheets.
- Identify Fasteners: Examine your fan for screws, clips, or latches holding the grilles or housing together. Refer to your fan’s user manual if available.
- Carefully Disassemble: Use the appropriate screwdriver or gently unclip the components. Place all removed screws and small parts in your small container to avoid losing them.
Cleaning the Components
Once disassembled, you can effectively clean each part.
- Grilles/Covers:
- For light dust, vacuum with a brush attachment.
- For heavy grime, wash removable grilles in a sink or bathtub with warm, soapy water. Use a soft sponge or cloth to scrub away dirt.
- Rinse thoroughly and allow to air dry completely before reattaching.
- Fan Blades:
- Pillowcase Method (for ceiling fans): Slip an old pillowcase over one blade, gently press both sides, and pull back to trap dust inside. Repeat for all blades.
- Wiping: For other fans or after the pillowcase method, dampen a microfiber cloth with a mild cleaning solution (dish soap and water or a 50/50 vinegar-water mix). Wipe each blade from the center outward, both top and bottom, removing all grime. Avoid spraying liquid directly onto blades, especially near the motor.
- Soaking (for removable plastic/metal blades): If blades are heavily soiled and can be detached, you can soak them in warm, soapy water for a deeper clean. Scrub gently with a toothbrush if needed.
- Dry Completely: Crucial for preventing dust attraction and moisture damage. Use a dry cloth to buff or let air dry.
- Motor Housing and Vents:
- Use a dry microfiber cloth to wipe the exterior of the motor housing.
- Employ a vacuum cleaner with a brush attachment to remove dust from vents and tight crevices.
- For stubborn dust in hard-to-reach motor vents, use short bursts of compressed air. Do this outdoors if possible to avoid dispersing dust indoors. Never get water or cleaning solutions directly into the motor or electrical components.
Cleaning Specific Fan Types
While the general steps apply, some fan types have unique considerations.
Ceiling Fans
Ceiling fans are notorious for collecting dust and are often the most intimidating to clean due to their height.
- Access Safely: Use a sturdy ladder.
- Pillowcase Power: This method is especially effective for ceiling fans to prevent dust from falling onto your furniture and floor.
- Light Fixtures: If your fan has lights, remove any glass globes and wash them in warm, soapy water. Dry completely before reattaching. Dust light bulbs with a microfiber cloth.
- Blade Removal (Optional but Recommended for Deepest Clean): For the most thorough clean, you can remove the blades. They are usually attached to brackets with screws. Carefully unscrew them, clean the blades and brackets, and then reattach.
Box Fans / Tower Fans
These portable fans are easier to access but can harbor significant dust.
- Box Fans: Often require a screwdriver to remove the front and sometimes back grilles. Once open, the blades can be cleaned with a damp, soapy cloth. For non-removable blades, vacuuming and compressed air are good alternatives. Ensure all parts are completely dry before reassembling.
- Tower Fans: Some tower fans can be disassembled by removing front or back panels, allowing access to internal blades. For models that don’t open, use a vacuum with a brush attachment and compressed air directed into the vents. Wrap a damp microfiber cloth around a thin tool to clean narrow slits. Consult your manual, as some tower fans should not be opened and doing so may void the warranty.
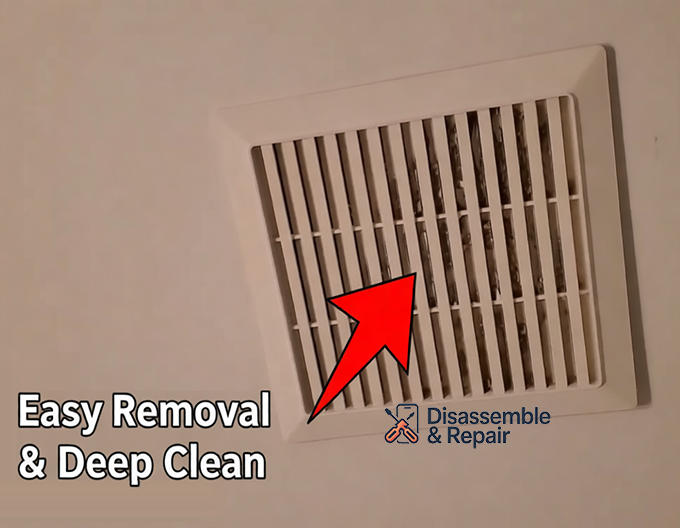
Bathroom Exhaust Fans
These fans work overtime removing moisture, making them prone to mold, mildew, and sticky dust accumulation. Cleaning a bathroom exhaust fan regularly is vital for preventing these issues.
- Remove the Vent Cover: Most covers are spring-loaded or held by a center screw. Gently pull or unscrew to remove.
- Clean the Cover: Wash the cover thoroughly in warm, soapy water to remove dust, hairspray, and grime. Rinse and air dry.
- Access and Clean Blades/Motor: With the cover off, you can often see the fan blades and motor. Use a vacuum with a brush attachment to suck up loose dust. For a deeper clean, you might need to remove the fan unit itself from the housing, which typically involves a few twists or screws.
- For a comprehensive guide on how to remove bathroom exhaust fan to clean, consider checking out resources like How to remove bathroom exhaust fan to clean. This can provide more detailed, fan-specific removal instructions to achieve a truly sparkling fan.
- Wipe Down Housing: Clean the recessed housing and brackets with a duster or vacuum crevice tool.
- Reassemble: Only when all parts are completely dry, reattach the fan unit and vent cover.
Reassembly and Testing
Once all components are clean and completely dry, it’s time to put your fan back together.
- Reverse Disassembly: Carefully reattach blades, grilles, and covers, ensuring all screws are tightened securely (but don’t over-tighten plastic parts). Refer to your small parts container for screws.
- Double-Check Connections: For ceiling or exhaust fans, ensure any electrical connections are securely reconnected if they were detached.
- Test: Plug in the fan or restore power at the breaker. Turn it on at a low setting first, then gradually increase the speed, listening for unusual noises or wobbling. Enjoy the fresh, uninterrupted airflow from your sparkling fan.
Tips for Maintaining a Sparkling Fan
Preventative maintenance is key to minimizing deep cleaning frequency.
- Regular Light Dusting: Every 2-3 weeks, give your fan a quick wipe-down with a microfiber cloth or an extendable duster.
- Vacuum Routinely: When vacuuming your home, use the brush attachment to quickly go over fan grilles and visible blades.
- Dust-Repelling Sprays: After cleaning, some recommend applying a dust-repelling spray to blades, though always test in an inconspicuous area first.
- Change Air Filters (if applicable): For fans with air filters (like some tower or bladeless fans), clean or replace them regularly as per manufacturer guidelines.
Common Mistakes to Avoid
- Spraying Liquids Directly onto the Fan: This can damage electrical components and motors, leading to fire hazards or malfunction. Always apply cleaner to a cloth first.
- Not Disconnecting Power: A serious safety risk that can lead to injury or electrocution.
- Reassembling Damp Parts: Moisture can attract dust, cause rust, or damage electrical components.
- Forcing Parts: If a part isn’t coming off easily, recheck your manual. Forcing can break clips or strip screws.
- Ignoring the Motor Area: While you shouldn’t get it wet, accumulated dust on the motor causes overheating and reduced efficiency. Use dry methods like vacuuming or compressed air.
Conclusion
A clean fan is more than just a visual upgrade; it’s an investment in your home’s air quality, energy efficiency, and appliance longevity. By following these straightforward steps for easy fan removal and deep cleaning, you can transform your dusty, underperforming fans into powerful, air-circulating marvels. Embrace the satisfaction of a truly sparkling fan, knowing you’ve created a healthier, more comfortable environment for your household. Make fan cleaning a regular part of your home maintenance routine, and breathe easier all year long.
FAQ
Why is it important to deep clean my fan?
A dirty fan doesn’t just look unsightly; it can diminish its efficiency, impact your indoor air quality, work harder, make more noise, and even spread pollutants throughout your living space. Beyond visual appeal, regular and thorough cleaning contributes significantly to your home environment.
Is deep cleaning a fan a complicated task?
No, achieving a sparkling fan isn’t a monumental task reserved for cleaning professionals. With a little guidance, the right tools, and some elbow grease, you can easily remove accumulated debris and restore your fan to its optimal condition.
What is the most important safety precaution before starting to clean a fan?
The most important safety precaution, as highlighted in the key takeaways, is to always unplug the fan or turn off power at the breaker before any cleaning.
What tools and supplies are recommended for deep cleaning a fan?
To deep clean your fan, you should gather essential gear such as microfiber cloths, screwdrivers, a vacuum with attachments, and mild cleaning solutions.