Whirlpool Refrigerator Door Hinge Repair
Ultimate Guide to Whirlpool Refrigerator Door Hinge Repair
A sagging or clicking fridge door is not just a cosmetic annoyance; it can lead to energy loss and spoiled food, making a Whirlpool Refrigerator Door Hinge Repair a priority for homeowners. If you have noticed that your appliance door no longer closes automatically or appears uneven, addressing the hinge assembly is the most effective solution. This comprehensive guide will walk you through the diagnostics, parts selection, and repair process to restore your refrigerator to optimal condition.

Understanding the Importance of Hinge Maintenance
The refrigerator is the centerpiece of the modern kitchen, and Whirlpool models are renowned for their durability. However, the constant opening and closing of the doors place significant stress on the hinge components. Over time, metal fatigue and plastic wear can compromise the seal.
If the door does not seal correctly, the magnetic door gasket cannot engage with the cabinet frame. This allows warm air to enter and cold air to escape, forcing the compressor to work overtime. Consequently, a simple mechanical failure in the hinge can lead to expensive appliance repair bills regarding the cooling system. By performing a timely repair, you extend the lifespan of the entire unit.
Read more whirlpool refrigerator water line installation
Diagnosing the Issue: Hinge vs. Cam Riser
Before you begin dismantling the appliance, it is vital to identify whether the issue lies with the hinge itself or the closing mechanism.
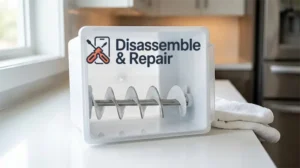
The Hinge Pin and Bracket
The hinge pin is the metal pivot point that holds the door to the bottom hinge bracket. On a side-by-side refrigerator, these bear significant weight. If the pin is bent or the bracket is loose, the door will sag visibly. You can check this by lifting the door slightly; if there is significant play or movement at the pivot point, the hinge assembly likely needs replacement.
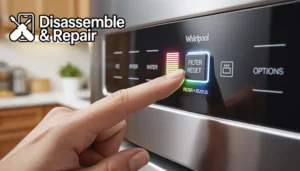
The Door Closing Cam
Whirlpool refrigerators frequently utilize a closing cam system. If you hear a loud “clunk” or “click” when opening the door, or if the door stays open instead of gravity-closing, the issue is likely the closing cam. This is a plastic component located at the bottom of the door that rides up a mate on the hinge. When these wear down, a door cam riser kit is required. This is often more common than a full metal hinge failure.
Preparation and Safety Measures
Successful repair work begins with proper preparation. Working on heavy appliances requires caution.
1. Power Down: Always unplug the refrigerator before starting any repair to eliminate electrical shock hazards.
2. Clear the Door: Remove all items from the door shelves. A French door refrigerator door can be deceptively heavy, and removing the contents prevents injury and damage to the door liner.
3. Secure the Tools: You will need a standard screwdriver set and a socket wrench set (usually 1/4 inch or 5/16 inch) to remove the hinge bolts.
Read more whirlpool refrigerator water dispenser leaking
Locating the Right Parts
Never guess when buying spare parts. Locate the model number plate, usually found on the interior wall of the refrigerator or near the kick plate. Use this specific number to order OEM replacement parts. While generic parts exist, Original Equipment Manufacturer (OEM) parts guarantee the correct metal tolerance and plastic durability required for heavy doors.
Step-by-Step Whirlpool Refrigerator Door Hinge Repair
This section details the core process of replacing the hinge or cam riser. Follow these steps carefully to ensure a safe and effective repair.
Step 1: Remove the Upper Hinge
To access the door assembly, you must first release the top.
- Locate the top hinge cover (often plastic) and remove it.
- If there are wires running through the hinge (common in doors with dispensers), disconnect the wiring harness carefully.
- Use your socket wrench set to remove the screws securing the top hinge.
- Lift the hinge away and set it aside.
Step 2: Remove the Door
With the top hinge removed, the door is effectively resting on the bottom pin.
- Open the door slightly.
- Lift the door straight up off the bottom hinge bracket.
- Place the door on a soft surface, such as a blanket or towel, to prevent scratching the finish.
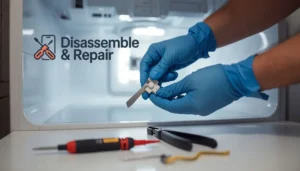
Step 3: Inspect and Replace Bottom Components
This is where the actual Whirlpool Refrigerator Door Hinge Repair takes place.
- Inspect the Bracket: Check the bottom bracket bolted to the fridge cabinet. If it is bent or rusted, unbolt it and install the new OEM bracket.
- Inspect the Pin: Ensure the hinge pin is straight and firmly seated in the bracket.
- Replace the Cam Riser: If you are installing a door cam riser kit, look at the bottom of the door and the top of the bottom hinge bracket. You will see plastic cams. Remove the old screws (often requiring a Torx or hex driver) and swap in the new cams. Grease them lightly if the kit includes lubricant.
Step 4: Reinstall the Door
- Lift the door and align the hole in the bottom of the door with the hinge pin.
- Lower the door carefully until it seats fully on the cam or bracket.
- Ensure the door is steady before letting go.
Step 5: Reattach the Top Hinge
- Position the top hinge over the screw holes.
- Insert the screws by hand first to avoid cross-threading, then tighten them with your socket wrench. Do not fully tighten yet; leave them slightly loose for the alignment phase.
- Reconnect any wiring harnesses and snap the hinge cover back into place.
Achieving Perfect Door Alignment
Merely attaching the door is not enough; it must be square with the cabinet to seal properly. Door alignment is the mark of a professional-grade repair.
Read more whirlpool refrigerator not cooling
Adjusting the Top Hinge
With the top hinge screws slightly loose, you can shift the top of the door left or right.
- Check the gap between the door and the top of the refrigerator. It should be uniform.
- Check the gap between the two doors (on French door or side-by-side models). They should be parallel.
- Once aligned, tighten the top hinge screws securely.
Utilizing Leveling Legs
Sometimes the door swings open too fast or not easily enough because the cabinet itself isn’t level.
Read more whirlpool vs ge refrigerator
- Locate the leveling legs behind the bottom kick plate (grille).
- Turn the legs clockwise to lower them or counter-clockwise to raise them.
- ideally, the front of the refrigerator should be slightly higher than the back. This allows gravity to assist the door in closing and ensures the hinge cams engage properly.
Checking the Magnetic Door Gasket
After the hinge is fixed and the door is aligned, inspect the gasket.
- Close the door and run your hand along the edge. You should feel no cold air escaping.
- Visually inspect for gaps. If the gasket got compressed during the repair, heat it gently with a hair dryer to expand the rubber back into shape.
- A “dollar bill test” is useful here: close the door on a dollar bill. You should feel resistance when pulling it out. If it slides out easily, the door is not aligned, or the gasket is failing.
Troubleshooting Common Post-Repair Issues
Even after a careful repair, issues can arise. Here is how to troubleshoot them.
The Door Still Clicks
If the clicking persists after replacing the cam riser, check the hinge pin for burrs or roughness. A damaged pin can catch on the new plastic cam. Additionally, ensure you used the correct screws for the cam; if the screw heads are not flush, they will grind against the mating surface.
The Door Is Crooked
If the door looks tilted, verify the bottom hinge bracket. If the screws holding the bracket to the cabinet frame were loose, the weight of the door may have pulled the bracket down. You may need to remove the door again, reposition the bottom bracket, and torque the bolts down tighter.
Uneven French Doors
On a French door refrigerator, it is common for one door to sit slightly lower than the other. Many Whirlpool models include an adjustable screw on the bottom or top hinge specifically for vertical adjustment. Consult your manual to see if your model supports this feature, or use washers provided in the hinge kit to elevate the lower door.
OEM vs. Aftermarket Parts: A Critical Distinction
As an SEO specialist and repair advisor, I cannot stress enough the importance of using OEM replacement parts.
- Tolerance: Aftermarket hinges often have slight variances in metal thickness. Even a millimeter difference can prevent the magnetic door gasket from sealing.
- Durability: The cams in a door cam riser kit undergo high friction. OEM parts use specific high-density plastics designed to last for years. Cheaper knockoffs often crack within months.
- Warranty: Using non-OEM parts can sometimes void the warranty on the compressor or other components if the bad seal causes system failure.
Conclusion
Performing a Whirlpool Refrigerator Door Hinge Repair is a manageable DIY project that offers significant returns in energy efficiency and appliance longevity. By gathering the correct tools—such as your socket wrench set—verifying your model number plate, and sticking to OEM replacement parts, you can restore the smooth operation of your French door refrigerator or side-by-side refrigerator.
Remember that the repair is not finished until the door alignment is verified and the leveling legs are set. If at any point the repair seems beyond your comfort level, or if the frame of the refrigerator appears damaged, do not hesitate to contact a professional appliance repair technician. However, for the majority of homeowners, this guide provides the roadmap to eliminating door sag and ensuring your food stays fresh.
Frequently Asked Questions
How can I tell if the problem is the hinge pin or the door cam riser?
If the refrigerator door is visibly sagging or has significant movement/play at the pivot point when you lift it, the metal hinge pin or bottom bracket is likely worn or bent. If you hear a loud clicking or “clunking” sound when opening the door, or if the door fails to close automatically using gravity, the plastic door cam riser is the most probable culprit.
Read more whirlpool refrigerator door hinge repair
Why should I use OEM replacement parts instead of cheaper generic options?
OEM (Original Equipment Manufacturer) parts are designed with the specific metal tolerances and high-density plastics required to support heavy refrigerator doors. Generic parts often have slight variances in thickness that can prevent the magnetic gasket from sealing properly, and they may wear out much faster, leading to potential cooling system failures or voided warranties.
What tools do I need to perform a Whirlpool door hinge repair?
Most Whirlpool models require a standard screwdriver set and a socket wrench set (specifically 1/4 inch or 5/16 inch) to remove the hinge bolts. Depending on your specific model, you may also need a Torx or hex driver to remove the screws holding the plastic cam risers in place.
How do I ensure the door is perfectly aligned after the repair?
Alignment is achieved by leaving the top hinge screws slightly loose while you position the door so it is square with the cabinet. Once the gaps are uniform, tighten the screws. Additionally, adjust the leveling legs behind the bottom kick plate so the front of the refrigerator sits slightly higher than the back, which allows gravity to assist in closing the door.
How can I check if the door gasket is sealing correctly after I finish the repair?
You can perform the “dollar bill test” by closing the door on a dollar bill. If you feel resistance when pulling the bill out, the seal is secure. If it slides out easily, the door may be misaligned or the gasket may be compressed. If the gasket is compressed, you can gently heat it with a hair dryer to help the rubber expand back into its original shape.