Whirlpool Refrigerator Door Seal Cleaning
The Ultimate Guide to Maintaining Your Appliance: Whirlpool Refrigerator Door Seal Cleaning
Maintaining the efficiency of your kitchen appliances requires attention to detail, specifically regarding Whirlpool refrigerator door seal cleaning. Neglecting this vital maintenance task can lead to significant energy loss, food spoilage, and expensive repair bills down the line. While the refrigerator is the workheart of the modern kitchen, the door gasket is often the most overlooked component until a problem arises.

As a Senior SEO Specialist and home maintenance expert, I have compiled this comprehensive guide to ensure your appliance operates at peak performance. This article details the professional methods for cleaning, maintaining, and troubleshooting the gasket on your Whirlpool unit.
The Critical Importance of the Refrigerator Gasket
The gasket is the flexible elastic strip attached to the outer edge of your refrigerator and freezer doors. While it may look like a simple piece of rubber, it is a sophisticated component often containing a magnetic strip that ensures the door clasps shut firmly against the unit’s frame.
The primary function of this component is to create an airtight seal. This seal keeps cold air inside the unit and prevents warm, ambient air from entering. When the gasket is dirty or compromised, the seal fails. This failure forces your refrigerator’s compressor to work harder and longer to maintain the set temperature, drastically reducing energy efficiency and shortening the lifespan of the appliance.
Furthermore, a dirty seal is a health hazard. Food particles, spills, and moisture can accumulate in the folds of the gasket, creating a breeding ground for bacteria. Without regular cleaning, this environment invites mold and mildew to develop, which can release spores into the air every time you open the fridge door.
Signs Your Gasket Requires Immediate Attention
Before diving into the cleaning process, it is essential to recognize the signs that your refrigerator door seal is dirty or failing.
- Visible Debris and Grime: If you can see black spots, sticky residue, or crumbs in the folds of the rubber, it is time to clean.
- Condensation Buildup: If you notice condensation or moisture droplets on the outside of the door or near the seal, cold air is escaping.
- The Dollar Bill Test: Close the refrigerator door on a dollar bill. If you can pull the bill out easily without resistance, the magnetic strip or the rubber elasticity is compromised, likely due to grime buildup.
- Mold Growth: Black or green patches indicate mold and mildew have penetrated the surface of the gasket.
Step-by-Step Guide for Whirlpool Refrigerator Door Seal Cleaning
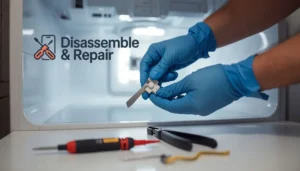
To restore your appliance to optimal condition, follow this professional protocol. This section covers the necessary tools and the precise technique to clean the seal without damaging the material.
Phase 1: Preparation and Tools
Using harsh chemicals on a refrigerator gasket can cause the material to become brittle and crack. Therefore, we utilize gentle, effective cleaning agents. Gather the following materials before you begin:
- Warm water
- Mild soap (Dish detergent is ideal)
- Baking soda
- Vinegar solution (White vinegar diluted with water)
- Microfiber cloth (2-3 cloths recommended)
- Petroleum jelly (for conditioning)
- Soft-bristled toothbrush (for deep crevices)
Phase 2: The General Cleaning Process
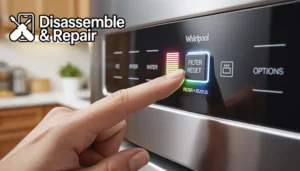
- Turn Off the Unit (Optional): While not strictly necessary, turning off the fridge prevents energy waste while the door is open for an extended period.
- Create the Cleaning Mixture: Mix warm water with a small amount of mild soap. Avoid boiling water, as extreme heat can warp the PVC material of the gasket.
- Wipe Down the Surface: Dip a microfiber cloth into the soapy water and wipe down the entire surface of the gasket. Ensure you clean both the refrigerator and freezer door seals.
- Clean the Folds: The gasket has accordion-like folds where debris hides. Wrap the damp cloth around your finger or use a soft toothbrush to gently scrub inside these grooves. This is where sticky liquids often harden, preventing an airtight seal.
Phase 3: Removing Mold and Mildew
If your inspection reveals black spots, soap and water will not be sufficient. You must kill the mold spores to prevent regrowth.
- Prepare a Vinegar Solution: Mix one part white vinegar with two parts water. The acidity of the vinegar is effective against mold but gentle enough for the rubber.
- Alternative Baking Soda Paste: For stubborn stains, create a paste using baking soda and a small amount of water. Apply this to the moldy areas and let it sit for 5 to 10 minutes. Baking soda acts as a mild abrasive and a deodorizer.
- Scrub Gently: Use the toothbrush to scrub the moldy areas with the vinegar solution or the baking soda paste.
- Rinse Thoroughly: Once the mold is removed, wipe the area with a fresh cloth dampened with plain water to remove any acidic or abrasive residue.
Phase 4: Drying and Conditioning
This is the most crucial step often missed by homeowners.
- Dry Completely: Use a dry microfiber cloth to remove all moisture from the gasket. Any lingering water can lead to condensation issues or rapid mold regrowth.
- Apply Petroleum Jelly: To maintain the elasticity of the rubber, apply a very thin layer of petroleum jelly along the hinge side and the surface of the seal. This conditions the material, prevents cracking, and helps the gasket slide smoothly against the metal frame, ensuring a tighter seal.
Troubleshooting Common Seal Issues
Even with rigorous Whirlpool refrigerator door seal cleaning, you may encounter structural issues. Here is how to address them professionally.
The Gasket is Loose or Sagging
Over time, the gasket may detach from the door liner.
Read more whirlpool refrigerator water leaking
- Solution: Most Whirlpool gaskets are push-in styles. Gently push the gasket lip back into the metal retainer channel. If it slips out constantly, you may need to apply a specialized weatherstrip adhesive, though this is rarely necessary for a gasket in good condition.
The Magnetic Strip is Weak
If the door pops open easily, the magnetic strip inside the rubber may be demagnetized or misaligned.
- Solution: Verify that the refrigerator is level. If the unit tilts too far forward, gravity works against the seal. If leveling doesn’t fix it, the magnet may be damaged, requiring a full gasket replacement.
Warped or Twisted Rubber
Sometimes, cleaning reveals that the rubber is twisted, preventing contact with the frame.
- Solution: Use a hair dryer on a low heat setting to warm the deformed section of the gasket. As the rubber warms, it becomes pliable. Mold it back into shape with your fingers and close the door, allowing it to cool in the correct position.
The Impact on Energy Efficiency and Longevity
The relationship between a clean gasket and energy efficiency cannot be overstated. A Whirlpool refrigerator is designed to operate within a specific thermal cycle. When the door seal is dirty or encrusted with food, gaps form. These gaps allow warm air to infiltrate the cooling compartment.
Read more best whirlpool refrigerator models
The thermostat detects this temperature rise and triggers the compressor. Instead of running for standard intervals, the compressor runs continuously to combat the heat influx. This leads to three negative outcomes:
- Increased Utility Bills: Your refrigerator is one of the only appliances that runs 24/7. Inefficiencies here are costly.
- Compressor Burnout: The compressor is the engine of your fridge. Overworking it significantly shortens the life of the appliance.
- Food Safety Risks: Inconsistent temperatures can cause food to spoil faster, particularly in the door shelves which are most susceptible to temperature fluctuations.
Maintenance Schedule: Best Practices
To avoid the need for intensive scrubbing or gasket replacement, integrate this task into your regular cleaning routine.
- Weekly: Wipe down the visible surface of the seal with a damp cloth when wiping down the exterior of the fridge.
- Monthly: Perform a deeper inspection of the folds and clean with mild soap and warm water.
- Quarterly: Condition the seal with petroleum jelly to keep the rubber supple and check for mold and mildew.
Frequently Asked Questions
Q: Can I use bleach to clean my Whirlpool refrigerator gasket?
A: It is not recommended. Bleach is a harsh chemical that can dry out the rubber, causing it to become brittle and crack. A vinegar solution is a much safer alternative for killing mold without damaging the seal.
Q: How do I know if I need to replace the gasket instead of cleaning it?
A: If the gasket has deep cracks, is torn, or if the magnetic strip is broken, cleaning will not restore the airtight seal. in these cases, replacement is the only option.
Q: Why is there condensation on my refrigerator door?
A: External condensation, often called “sweating,” usually indicates an air leak. If the cold air from inside meets the warm humid air of your kitchen, water droplets form. This is a primary indicator that you need to perform Whirlpool refrigerator door seal cleaning or check the gasket alignment.
Q: Does petroleum jelly really help?
A: Yes. Rubber and vinyl naturally dry out over time. A thin layer of petroleum jelly acts as a moisturizer for the gasket, extending its life and helping it form a better vacuum against the refrigerator frame.
Conclusion
Your Whirlpool refrigerator is an investment in your home and your health. While the door seal is a passive component, its role in maintaining temperature, hygiene, and energy efficiency is active and vital. By adhering to a regular schedule of Whirlpool refrigerator door seal cleaning, you protect your food from spoilage, your family from mold, and your wallet from unnecessary energy costs.
Remember to treat the gasket with care. Avoid harsh chemicals, focus on the hidden crevices where crumbs collect, and condition the rubber to prevent drying. With just a few minutes of maintenance using simple tools like a microfiber cloth, baking soda, and warm water, you can extend the operational life of your refrigerator for years to come.
Read more whirlpool refrigerator freezer not cold enough
Frequently Asked Questions
Is it safe to use bleach to clean the mold off my Whirlpool refrigerator gasket?
No, using bleach is not recommended. Bleach is a harsh chemical that can cause the rubber or PVC material of the gasket to become brittle and eventually crack. Instead, use a solution of one part white vinegar and two parts water to effectively kill mold and mildew spores without damaging the seal’s structural integrity.
How can I tell if my door seal needs to be replaced instead of just cleaned?
If you notice deep cracks, physical tears, or if the gasket has become stiff and brittle, cleaning will not restore its function. Additionally, if the magnetic strip inside the seal is broken or no longer pulls the door toward the frame, a full replacement is necessary to maintain the refrigerator’s energy efficiency.
What is the “dollar bill test” and how do I perform it?
The dollar bill test is a simple way to check the strength of your door seal. Close the refrigerator door on a dollar bill so that half is inside and half is outside. Try to pull the bill out; if it slides out easily with no resistance, your gasket is either too dirty to form a vacuum or has lost its elasticity and needs professional attention.
Why should I apply petroleum jelly to the door seal?
Applying a very thin layer of petroleum jelly acts as a conditioner for the rubber. It prevents the gasket from drying out and cracking over time, especially on the hinge side where the material experiences the most stress. It also helps the gasket slide smoothly against the metal frame, creating a tighter, more effective airtight seal.
Why is there water or condensation forming on the outside of my refrigerator door?
External condensation, or “sweating,” is a classic sign of a failing seal. This happens when the cold air from inside the unit escapes through gaps caused by dirt or warping and meets the warm, humid air of your kitchen. If you see moisture, it is a clear indicator that you need to clean the gasket and check its alignment.