Whirlpool Refrigerator Gasket Replacement: A Comprehensive Guide to Restoring Efficiency
Maintaining the thermal integrity of your kitchen appliances is essential, and a timely Whirlpool refrigerator gasket replacement is often the single most effective maintenance task you can perform. When the flexible strip of rubber sealing your appliance deteriorates, cold air escapes and warm air infiltrates, causing the compressor to run continuously and driving up your electricity costs. This guide serves as a detailed resource for professionals and homeowners alike, covering everything from identifying failure symptoms to the precise installation of a new seal.

The Critical Role of the Door Seal
The door seal, technically known as a gasket, is the unsung hero of food preservation. It creates a vacuum-like barrier that keeps the interior environment stable. Over time, exposure to fluctuating temperatures, food spills, and general wear and tear causes the rubber to crack, brittle, or lose its magnetism.
When this barrier fails, the refrigerator loses its energy efficiency. The compressor must work overtime to maintain the set temperature, which not only increases your utility bills but also shortens the lifespan of the appliance’s mechanical components. Furthermore, a compromised seal allows bacteria and mold to thrive in the crevices of the rubber, posing a hygiene risk to your stored food.
Signs Your Refrigerator Needs Attention
Before ordering parts, it is crucial to confirm that the gasket is indeed the culprit. While visible tears are obvious indicators, other symptoms can be more subtle.
Condensation and Moisture
If you notice beads of water or condensation forming on the exterior of the door or around the seal itself, it is a clear sign that cold air is leaking out. Inside the unit, this moisture often manifests as water pooling at the bottom of the fresh food compartment.
Frost Buildup in the Freezer
A failing seal on the freezer door often results in rapid frost buildup. When warm, humid air enters the freezer, it immediately turns to ice upon contact with the cold surfaces. If your freezer looks like a winter landscape despite having a defrost cycle, the gasket is likely failing to create an airtight seal.
The Dollar Bill Test
A professional diagnostic method involves closing the door on a dollar bill. If you can pull the bill out with no resistance, the magnetic gasket has lost its grip or the rubber has compressed too much to function correctly. This test should be performed at multiple points around the perimeter of the door.
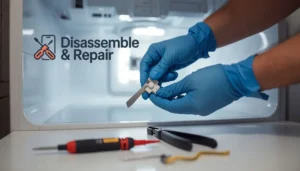
Locating the Correct OEM Replacement Parts
Success in this repair begins with accurate sourcing. Whirlpool manufactures a vast array of refrigerators, and gaskets are not universal. To ensure a perfect fit, you must locate the specific model number of your unit. This is typically found on a silver or white sticker located on the interior wall of the fresh food compartment or near the kick plate at the bottom.
Read more whirlpool refrigerator error codes list
It is highly recommended to use OEM replacement parts (Original Equipment Manufacturer) rather than generic aftermarket alternatives. OEM parts are engineered to the exact specifications of your Whirlpool unit, ensuring the magnetic strength and rubber composition are sufficient to seal the heavy doors effectively. Generic parts often suffer from poor sizing or weak magnets, leading to a repeat of the initial problem.
Read more whirlpool refrigerator thermostat adjustment
Step-by-Step Whirlpool Refrigerator Gasket Replacement
Replacing the gasket is a straightforward process, but it requires patience and attention to detail. Follow these steps to ensure a professional-grade installation.
Tools Required
- New OEM Gasket
- Putty knife or flat-head screwdriver
- Hair dryer or heat gun (low setting)
- Silicone lubricant
- Mild detergent and warm water
- Hex nut driver (for older models with retainer strips)
Phase 1: Preparation
- Unpack and Acclimatize: New gaskets are often shipped folded in boxes. Remove the gasket and lay it flat on a large table or the floor for at least 24 hours. This allows the rubber to relax and return to its original shape.
- Clean the Surface: While the door is open, clean the metal surface of the door liner thoroughly. Old food residue or sticky spills will prevent the new gasket from seating flush against the metal.
Phase 2: Removal of the Old Gasket
Modern Whirlpool refrigerators typically use a “push-in” style gasket, though older models may use screws and a retainer strip.
- For Push-in Styles: Grasp the inner corner of the seal and pull it firmly away from the door liner. It should snap out of the groove. If it is stubborn, use a putty knife to gently pry the edge up, being careful not to scratch the liner.
- For Screw-on Styles: Lift the edge of the gasket to reveal the screws underneath. Loosen them around the perimeter of the door—do not remove them entirely. Once loosened, the old gasket can be slid out from behind the retainer strip.
Phase 3: Installation
- Positioning: Start at the top corners of the door. Press the dart (the arrow-shaped ridge on the back of the gasket) firmly into the channel on the door liner.
- Working the Perimeter: Work your way down the sides and across the bottom, pressing firmly every few inches to ensure the dart is fully seated.
- Check for Alignment: Ensure the gasket is square and not twisted. A twisted gasket will not seal.
Phase 4: Heat Treatment and Shaping
It is common for a new gasket to have kinks or gaps, particularly on the hinge side, immediately after installation. This is where thermal manipulation is necessary.
- Apply Heat: Use a hair dryer on a low or medium setting to warm the areas where the gasket is not touching the refrigerator cabinet. Keep the dryer moving to avoid melting the rubber.
- Mold the Shape: As the rubber warms, it becomes pliable. Gently massage the gasket outward so it meets the cabinet. Close the door and continue to apply heat to the outside of the seal, allowing the magnetic gasket to pull itself against the metal cabinet.
- Cooling: Keep the door closed for several minutes while the rubber cools. This “trains” the gasket to hold the correct shape.
Phase 5: Lubrication
To prevent the gasket from binding or folding over on the hinge side when the door is opened, apply a thin layer of silicone lubricant to the face of the gasket on the hinge side. This reduces friction and ensures the door closes smoothly without dragging the seal out of alignment.
Troubleshooting Common Issues
Even with a careful installation, you may encounter minor issues. Here is how to address them to ensure an airtight seal.
The Door Won’t Stay Closed
If the door pops open or doesn’t seal, the magnet may be weak, or the gasket may be too stiff. Re-apply heat with the hair dryer and tape the door shut with masking tape for 24 hours. This forces the gasket to mold to the cabinet shape.
Gaps at the Corners
Corners are the most common failure point. If there is a gap, you can place a small amount of rolled-up paper towel or cotton behind the gasket in the corner to push it outward. Leave this “shim” in place for a few days until the rubber stretches to accommodate the gap, then remove it.
Maintenance for Longevity
Once you have successfully completed the Whirlpool refrigerator gasket replacement, regular maintenance will extend the life of the new part.
- Regular Cleaning: Wipe the gasket down every three months with warm, soapy water. Avoid bleach or ammonia-based cleaners, as these can dry out the rubber and cause premature cracking.
- Inspect for Debris: Crumbs and sticky spills act as an abrasive and an adhesive. If the gasket sticks to the cabinet frame, it pulls on the rubber every time you open the door, eventually leading to tears.
- Check the Level: Ensure your refrigerator is leveled properly. If the unit tilts too far forward, the door may not swing shut easily; if it tilts too far back, the door may slam, compressing the gasket excessively.
Conclusion
A compromised door seal is more than a cosmetic issue; it is a drain on your finances and a threat to your food safety. By recognizing the signs of failure—such as frost buildup or external condensation—and performing a professional Whirlpool refrigerator gasket replacement, you restore the appliance to its peak performance.
Utilizing OEM replacement parts and following proper installation techniques, including the use of heat to mold the seal, ensures that your refrigerator maintains an airtight seal. This small investment of time and resources yields significant returns in energy efficiency and the longevity of your Whirlpool appliance. Whether you are a DIY enthusiast or a seasoned technician, attention to detail during this process ensures your refrigerator continues to operate as the reliable heart of your kitchen.
Read more whirlpool refrigerator best models 2026
Frequently Asked Questions
How can I determine if my Whirlpool refrigerator gasket actually needs to be replaced?
A simple way to check is the “Dollar Bill Test.” Close the refrigerator door on a dollar bill and try to pull it out. If the bill slides out with no resistance, the magnetic seal is failing. Other common indicators include visible cracks in the rubber, excessive frost buildup in the freezer, or moisture and condensation forming on the outside of the door.
Why is it recommended to use OEM parts instead of cheaper generic gaskets?
OEM (Original Equipment Manufacturer) parts are specifically engineered to the exact dimensions and magnetic specifications of your Whirlpool model. Generic aftermarket gaskets often use lower-quality rubber or weaker magnets, which can lead to a poor fit, persistent gaps, and a failure to maintain an airtight seal, eventually costing more in energy bills.
Read more whirlpool refrigerator drain pan cleaning
What should I do if my new gasket has gaps and won’t touch the refrigerator frame?
It is common for new gaskets to have kinks from shipping. You can resolve this by using a hair dryer on a low heat setting to warm the rubber until it becomes pliable. Once the rubber is warm, massage it outward to meet the cabinet and close the door. The internal magnets will help pull the seal into the correct position as the rubber cools and “trains” to the proper shape.
How can I extend the lifespan of my new refrigerator door seal?
To prevent the rubber from drying out or cracking, clean the gasket every three months using only mild detergent and warm water. Avoid harsh chemicals like bleach or ammonia, as these can damage the integrity of the rubber. Additionally, ensure the refrigerator is properly leveled so the door closes with the correct amount of pressure against the gasket.