Whirlpool Refrigerator Interior Light Bulb Replacement
A Comprehensive Guide to Whirlpool Refrigerator Interior Light Bulb Replacement
Maintaining proper visibility within your fresh food compartment is essential, making a Whirlpool Refrigerator Interior Light Bulb Replacement a priority when your appliance suddenly goes dark. While this may appear to be a minor maintenance issue, a functioning light is critical for organizing groceries, identifying spoilage, and ensuring the overall efficiency of your kitchen workflow.

In this detailed guide, we will explore the technical nuances of replacing your refrigerator lighting, from selecting the correct appliance bulb to navigating the specific housing assemblies of Whirlpool models. Whether you are dealing with a standard top-freezer unit or a complex French door configuration, this article covers the essential steps and safety protocols required for a successful repair.
Read more whirlpool refrigerator stainless steel cleaning
Understanding Refrigerator Lighting Systems
Before attempting any repair, it is helpful to understand the lighting system within your appliance. Modern Whirlpool refrigerators utilize specific lighting configurations designed to withstand cold temperatures and frequent on-off cycling. Unlike standard household lamps, the environment inside a refrigerator is damp and cold, requiring robust components.
When a light fails, it is usually due to a burnt-out filament in an incandescent bulb or a driver failure in an LED refrigerator bulb. However, the issue can occasionally stem from a faulty door switch or a corroded light socket. Regular kitchen appliance maintenance involves checking these components to ensure they are free of debris and condensation, which can shorten the lifespan of your bulbs.
Identifying the Correct Replacement Part
One of the most critical steps in this process is sourcing the correct bulb. Installing a bulb with the wrong wattage or base size can damage the plastic housing or, in rare cases, pose a fire hazard.
Locating Your Model Number
To guarantee compatibility, you must first locate your appliance’s model number. On most Whirlpool units, this information is printed on a sticker located on the interior wall of the refrigerator or freezer compartment. Sometimes, it may be found behind the crisper drawers or on the kick plate at the bottom of the unit. Using the specific model number allows you to cross-reference compatible OEM replacement parts rather than guessing based on visual appearance.
Bulb Specifications
Whirlpool refrigerators typically use one of two types of bulbs:
- The A15 Appliance Bulb: This is often a 40-watt appliance bulb with a standard medium base. It looks similar to a regular lamp bulb but is smaller and designed to withstand vibration and cold.
- The T8 or Intermediate Bulb: Many newer or smaller models utilize a bulb with an E17 intermediate base. This base is narrower than a standard light bulb base.
Recently, there has been a significant shift toward LED technology. An LED refrigerator bulb is highly recommended over an incandescent version because it emits less heat, consumes less energy, and lasts significantly longer. If your fridge currently uses an incandescent bulb, you can likely upgrade to an LED equivalent, provided the base size (E26 or E17) matches.
Electrical Safety and Preparation
Electrical safety is paramount when working with any appliance. Before you begin the replacement process, you must eliminate the risk of electric shock.
- Disconnect Power: Unplug the refrigerator from the wall outlet. If the outlet is inaccessible, turn off the circuit breaker that supplies power to the kitchen.
- Clear the Area: Remove food items stored on the top shelf directly below the light housing to prevent accidental breakage or contamination if the bulb shatters.
- Dry Your Hands: Ensure your hands are completely dry before touching the light socket or internal components.
Step-by-Step: Whirlpool Refrigerator Interior Light Bulb Replacement
Once you have the correct replacement part and have secured the area, you are ready to proceed. Follow these instructions carefully to perform a safe and effective Whirlpool Refrigerator Interior Light Bulb Replacement.
Step 1: Accessing the Light Housing
In most Whirlpool models, the bulb is protected by a plastic light shield or light lens cover. This shield prevents shattered glass from falling into your food and diffuses the light.
- Inspect the cover for mounting screws. Some shields are held in place by a single screw, usually a 1/4-inch hex head or a Phillips head.
- If there are no screws, the cover is likely held by locking tabs. Gently squeeze the lens cover on the sides to release the tabs from the slots in the control housing.
- Pull the cover down and forward carefully. Old plastic can be brittle due to the cold environment, so apply steady, gentle pressure to avoid cracking the light lens cover.
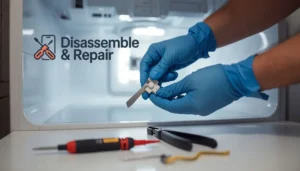
Step 2: Removing the Old Bulb
With the shield removed, you will see the bulb.
- Grip the bulb firmly but gently. If it is an incandescent bulb that was recently on, allow it to cool for a few minutes to avoid burns.
- Turn the bulb counterclockwise to unscrew it from the light socket.
- If the bulb breaks during removal, use a pair of needle-nose pliers to grip the metal base of the bulb remains and twist it out. Ensure the refrigerator is definitely unplugged before attempting this.
Step 3: Inspecting the Socket
Before installing the new bulb, take a moment to inspect the empty socket. Look for signs of corrosion or dark soot, which could indicate an electrical short. If the socket appears damaged, simple bulb replacement may not fix the issue, and more advanced appliance repair might be necessary.
Step 4: Installing the New Bulb
Take your new OEM replacement parts (whether it is a 40-watt appliance bulb or an LED variant).
- Insert the bulb into the socket.
- Turn it clockwise until it is snug. Do not overtighten, as this can damage the contact points in the socket or crack the bulb base.
- If you are installing an LED refrigerator bulb, ensure it is screwed in straight to make proper contact.
Step 5: Reinstalling the Light Shield
- Align the tabs of the plastic light shield with the slots in the housing.
- Snap the cover back into place. If your model uses screws, reinstall them now, ensuring you do not strip the plastic threads.
- Verify that the shield is secure and will not rattle when the refrigerator motor runs.
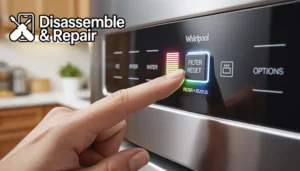
Step 6: Restoring Power and Testing
- Plug the refrigerator back in or flip the circuit breaker on.
- Open the refrigerator door. The light should illuminate immediately.
- Check the door switch by pressing it manually; the light should turn off when the switch is depressed and turn on when released.
Troubleshooting Common Issues
Even after a successful bulb replacement, homeowners sometimes encounter lingering issues. Here are common problems and solutions related to refrigerator lighting.
The New Bulb Won’t Turn On
If the fresh bulb fails to light up, the problem may not be the bulb itself.
- Door Switch Failure: The plunger switch located on the door frame controls the light. If this switch is stuck or broken, the fridge “thinks” the door is closed and keeps the light off. Toggle the switch manually to see if it moves freely.
- Socket Corrosion: If the light socket contacts are corroded, electricity cannot flow to the bulb. This often happens in high-humidity environments.
- Wiring Issues: In older units, the wiring harness connecting to the light assembly may have become loose or damaged.
The Light Stays On When Door is Closed
This is a more severe issue because the heat from an incandescent bulb can warm the refrigerator interior, potentially spoiling food and damaging the plastic light shield through melting. This is almost exclusively caused by a faulty door switch or a misalignment of the door, preventing the switch from being depressed.
Flickering LED Bulbs
If you upgraded to an LED and it flickers, the bulb might not be dimmable (some fridges have a “ramp up” lighting feature), or it might be incompatible with the voltage supplied by the refrigerator’s control board. Always stick to OEM replacement parts recommended for your specific model number to avoid this.
The Importance of Using OEM Replacement Parts
When performing a Whirlpool Refrigerator Interior Light Bulb Replacement, the temptation to use generic, cheap bulbs is high. However, Original Equipment Manufacturer (OEM) parts are designed specifically for the engineering tolerances of your Whirlpool appliance.
Generic bulbs often lack the necessary shielding against humidity. Furthermore, an LED refrigerator bulb designed for general room lighting may not function correctly in sub-zero temperatures (for freezer sections) or high-humidity zones. OEM parts ensure that the E17 intermediate base or standard base fits the light socket perfectly, preventing arcing and premature failure.
Read more whirlpool refrigerator not cooling
Conclusion
Maintaining the lighting in your refrigerator is a straightforward task that significantly improves the usability of the appliance. By following the correct safety procedures, identifying the right model number, and selecting high-quality OEM replacement parts, you can ensure your Whirlpool Refrigerator Interior Light Bulb Replacement is a success.
Regular kitchen appliance maintenance, such as cleaning the light lens cover and checking the door switch, will extend the life of your lighting assembly. Whether you opt for a traditional 40-watt appliance bulb or a modern LED upgrade, proper installation ensures that your food remains visible and your appliance continues to operate safely and efficiently. If you encounter persistent electrical issues during this process, do not hesitate to contact a professional for advanced appliance repair.
Frequently Asked Questions
How do I find the correct replacement bulb for my specific Whirlpool model?
To find the exact bulb required, locate your refrigerator’s model number on the sticker inside the refrigerator wall, behind the crisper drawers, or on the bottom kick plate. You can then use this number to purchase OEM replacement parts. Most Whirlpool models use either an A15 appliance bulb with a standard base or a T8 bulb with an E17 intermediate base.
Can I upgrade from a traditional incandescent bulb to an LED bulb?
Yes, in most cases you can upgrade to an LED refrigerator bulb as long as the base size (standard E26 or intermediate E17) matches your current socket. LED bulbs are highly recommended because they produce less heat, are more energy-efficient, and have a significantly longer lifespan than incandescent bulbs.
What should I do if the light does not turn on after I install a new bulb?
If a new bulb fails to illuminate, first check the door switch (the plunger-style button on the frame). If the switch is stuck or faulty, the refrigerator will not trigger the light. Additionally, inspect the light socket for signs of corrosion or soot. If the socket is damaged or the wiring is loose, you may need a professional appliance repair.
Is it safe to change the light bulb without unplugging the refrigerator?
For maximum electrical safety, you should always disconnect the power by unplugging the unit or turning off the circuit breaker. This prevents the risk of electric shock and protects you in case the bulb shatters during removal, which would require using tools like needle-nose pliers near the live electrical contacts of the socket.
How do I remove the plastic light lens cover without breaking it?
First, check for any mounting screws (usually Phillips or hex head) securing the shield. If there are no screws, the cover is held by locking tabs. Gently squeeze the sides of the light lens cover to release the tabs from the housing. Because cold plastic can become brittle, apply steady, gentle pressure rather than force to avoid cracking the shield.
Read more whirlpool refrigerator serial number lookup